Set up shipping labels and print them automatically
Make a shipping label template with your logo, a Ship to box and the order number, then print it by hand or for every Shopify order or spreadsheet.
By Ryan Soanes · Updated 22 October 2026
A shipping label only needs designing once: where the address goes, your logo, a “Ship to” heading and the order number. After that, every address fills the same box in the same way, whether you paste in a few by hand or MagLab prints one for each order as it comes in.
This guide makes a 4 × 6” label for a thermal label printer, a common size for parcel labels. The same steps work on a sheet of labels, such as Avery L7173 (10 to a sheet of A4) or Avery 5164 (6 to a sheet of US Letter).
Start from the label you print on
- In MagLab, open Templates and search for 4 × 6” Thermal Shipping Label (or your sheet’s Avery number).
- Click ⋯ on the template and choose Customise a copy…. Your copy opens in the Designer, so the built-in template stays as it was.
To start with, the whole label is one shape. That shape is where each address will go.
Make the address box
Click the shape to select it, then drag the handles on its corners and sides until it covers just the space for the address, below where the heading will go. The sides snap to the grid as you drag; hold ⌥ (Alt) to place them freely, or type exact sizes in X, Y, Width and Height on the right.
With the shape still selected, open Text on the right and choose Left for Text across and Top for Text down. Addresses then start in the box’s top left corner, as on a parcel, rather than floating in the middle.
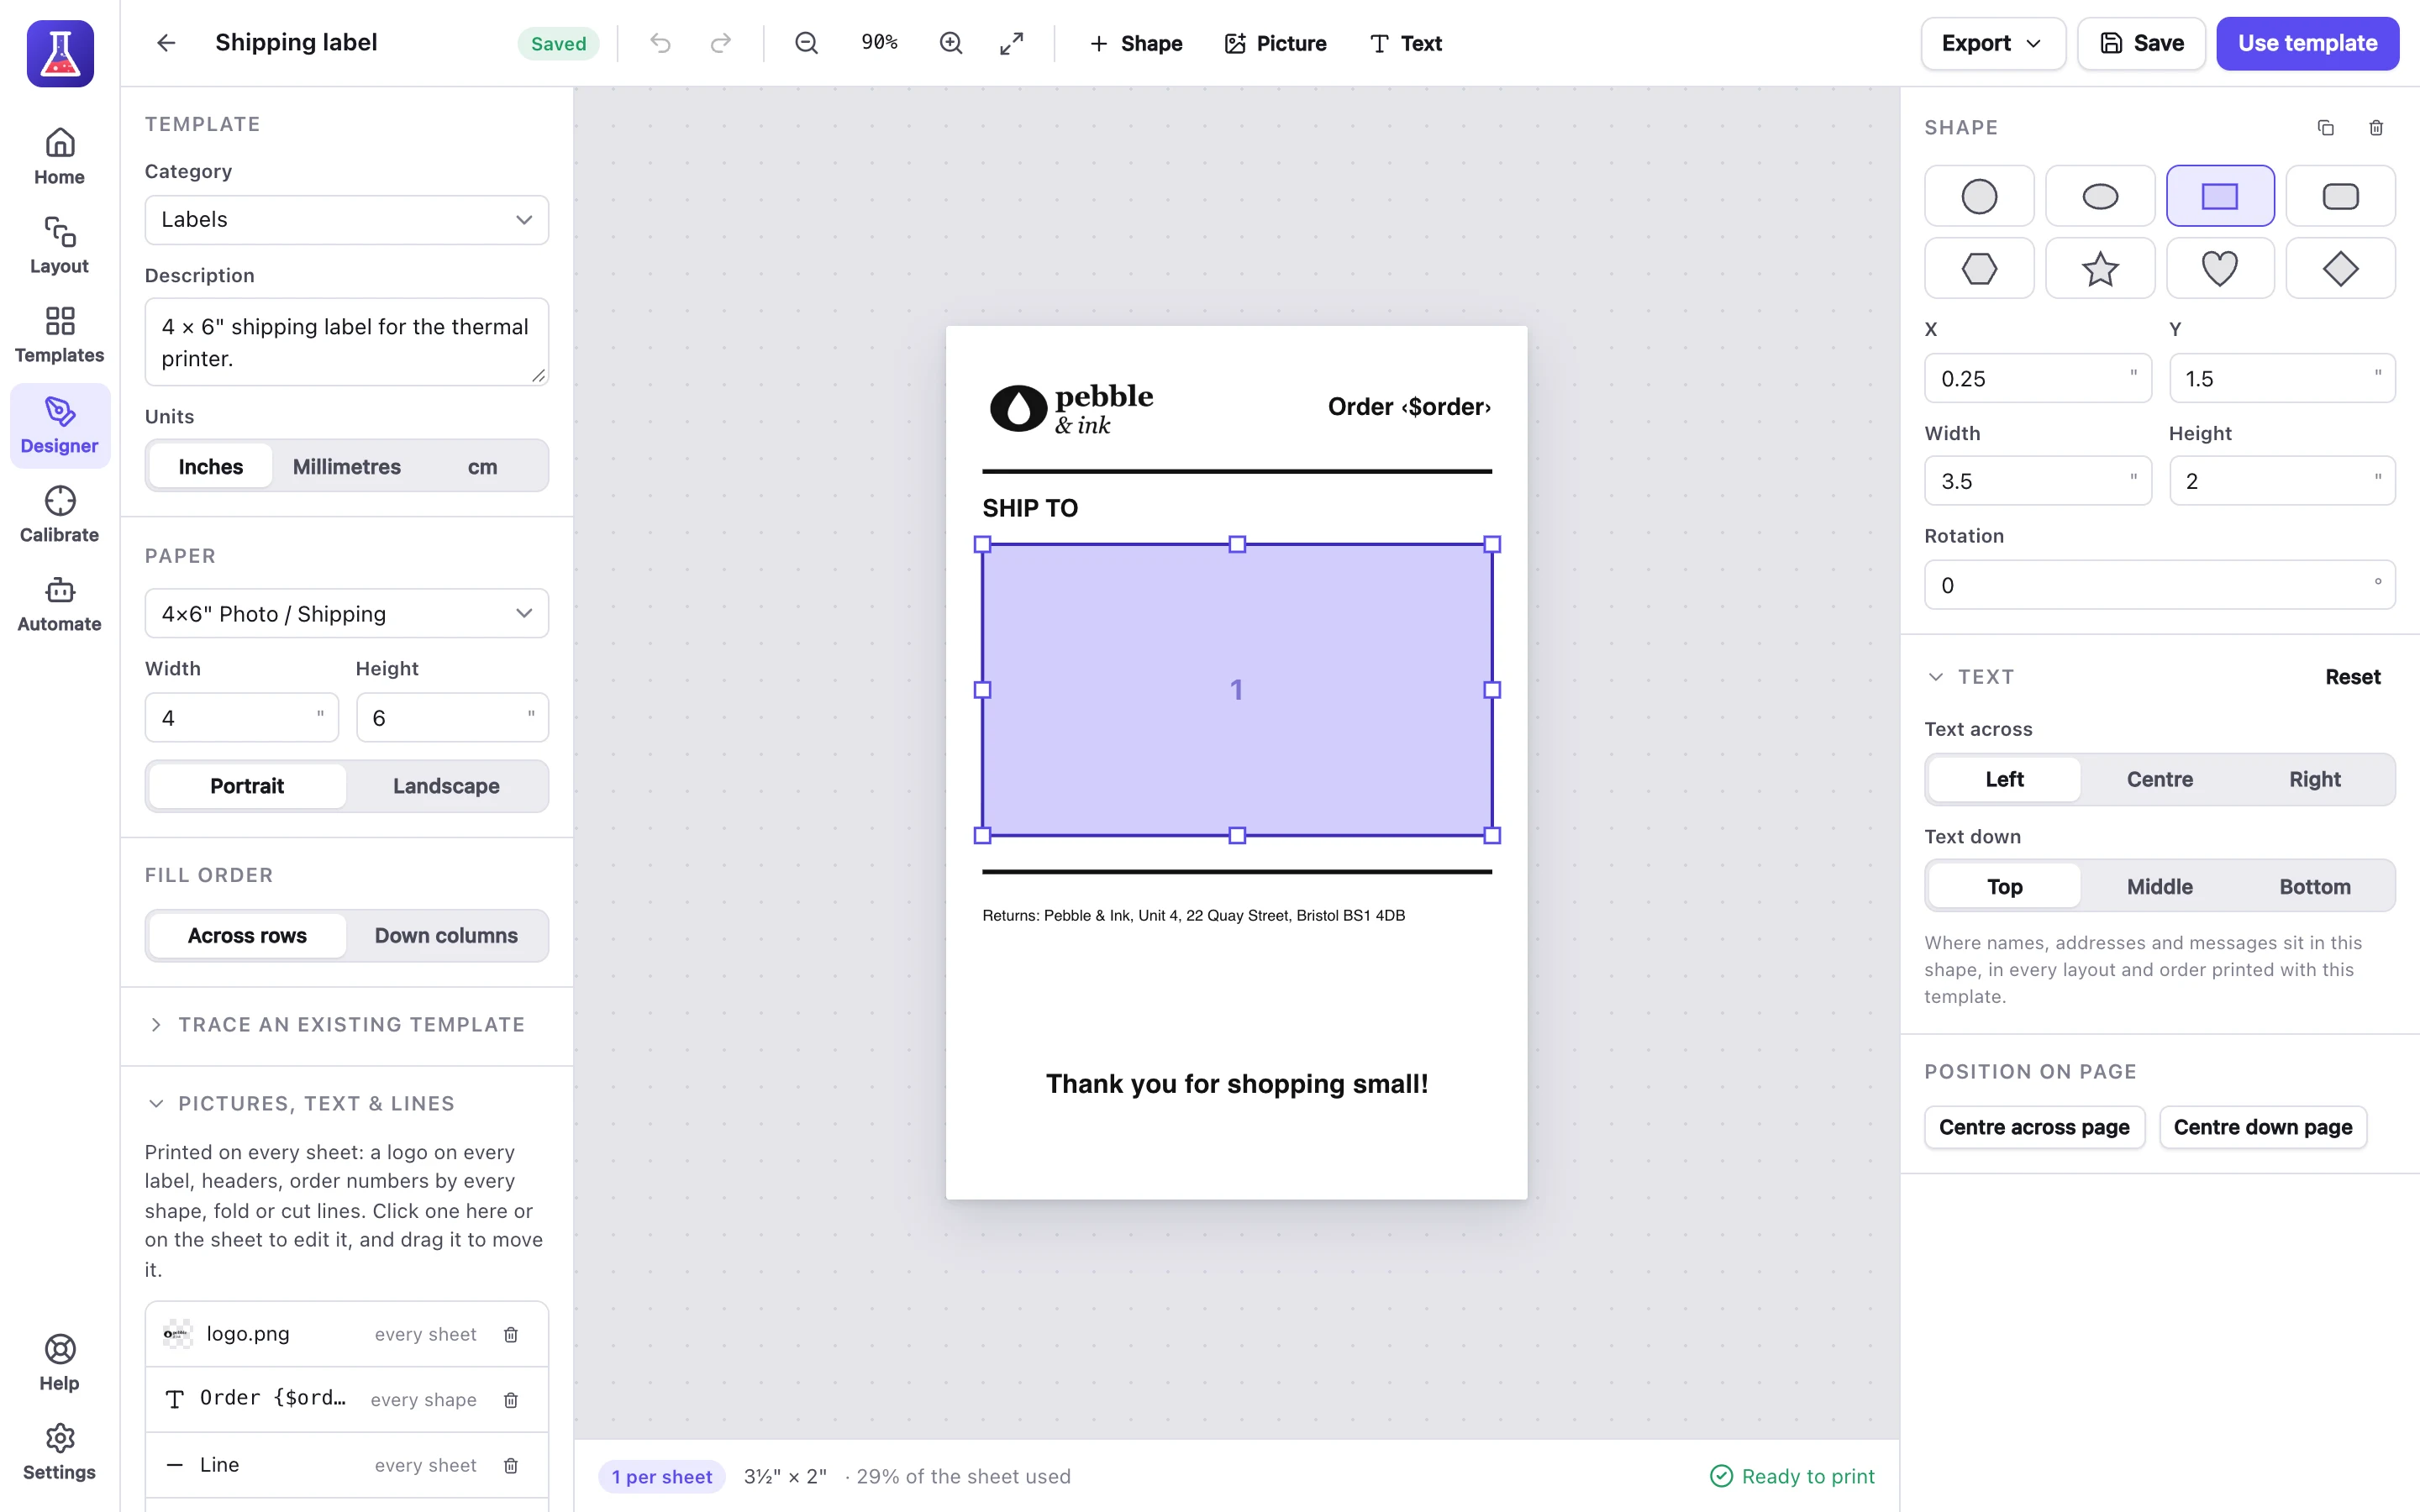
These settings belong to the box, so they apply to every label printed with this template: ones you print yourself, and ones printed for orders. The text size and the gap from the box’s edge are under Default text style on the left. Long addresses shrink to fit the box.
Add your logo, a heading and the order number
Everything else on the label goes in Pictures, text & lines on the left, or with Picture and Text in the toolbar:
- Your logo: Picture → Once on every sheet, and choose the file. A PNG with a transparent background looks best. Thermal printers print in black only, so a black logo comes out cleanest. Drag it into place, and drag its corner to size it.
- A heading: Text → Once on every sheet, type
SHIP TO, and drag it above the address box. - Lines to divide the label: + Line, then drag its ends.
- Your returns address, or a thank-you note: more Text.
- The order number: Text → By every shape, and type
Order {$order}. Text by a shape travels with that shape’s order, so drag it to the top of the label.
On a sheet with several labels, choose On every shape and By every shape instead, so each label gets its own logo and heading.
When it looks right, click Save to library. The template is now under Templates, marked Mine.
Print labels yourself
Click the template to start a layout, open Text & labels, and paste in the addresses with a blank line between each one. Place all puts each address on its own label: a new sheet for each one on a 4 × 6” template, or the next label along on a sheet of labels.
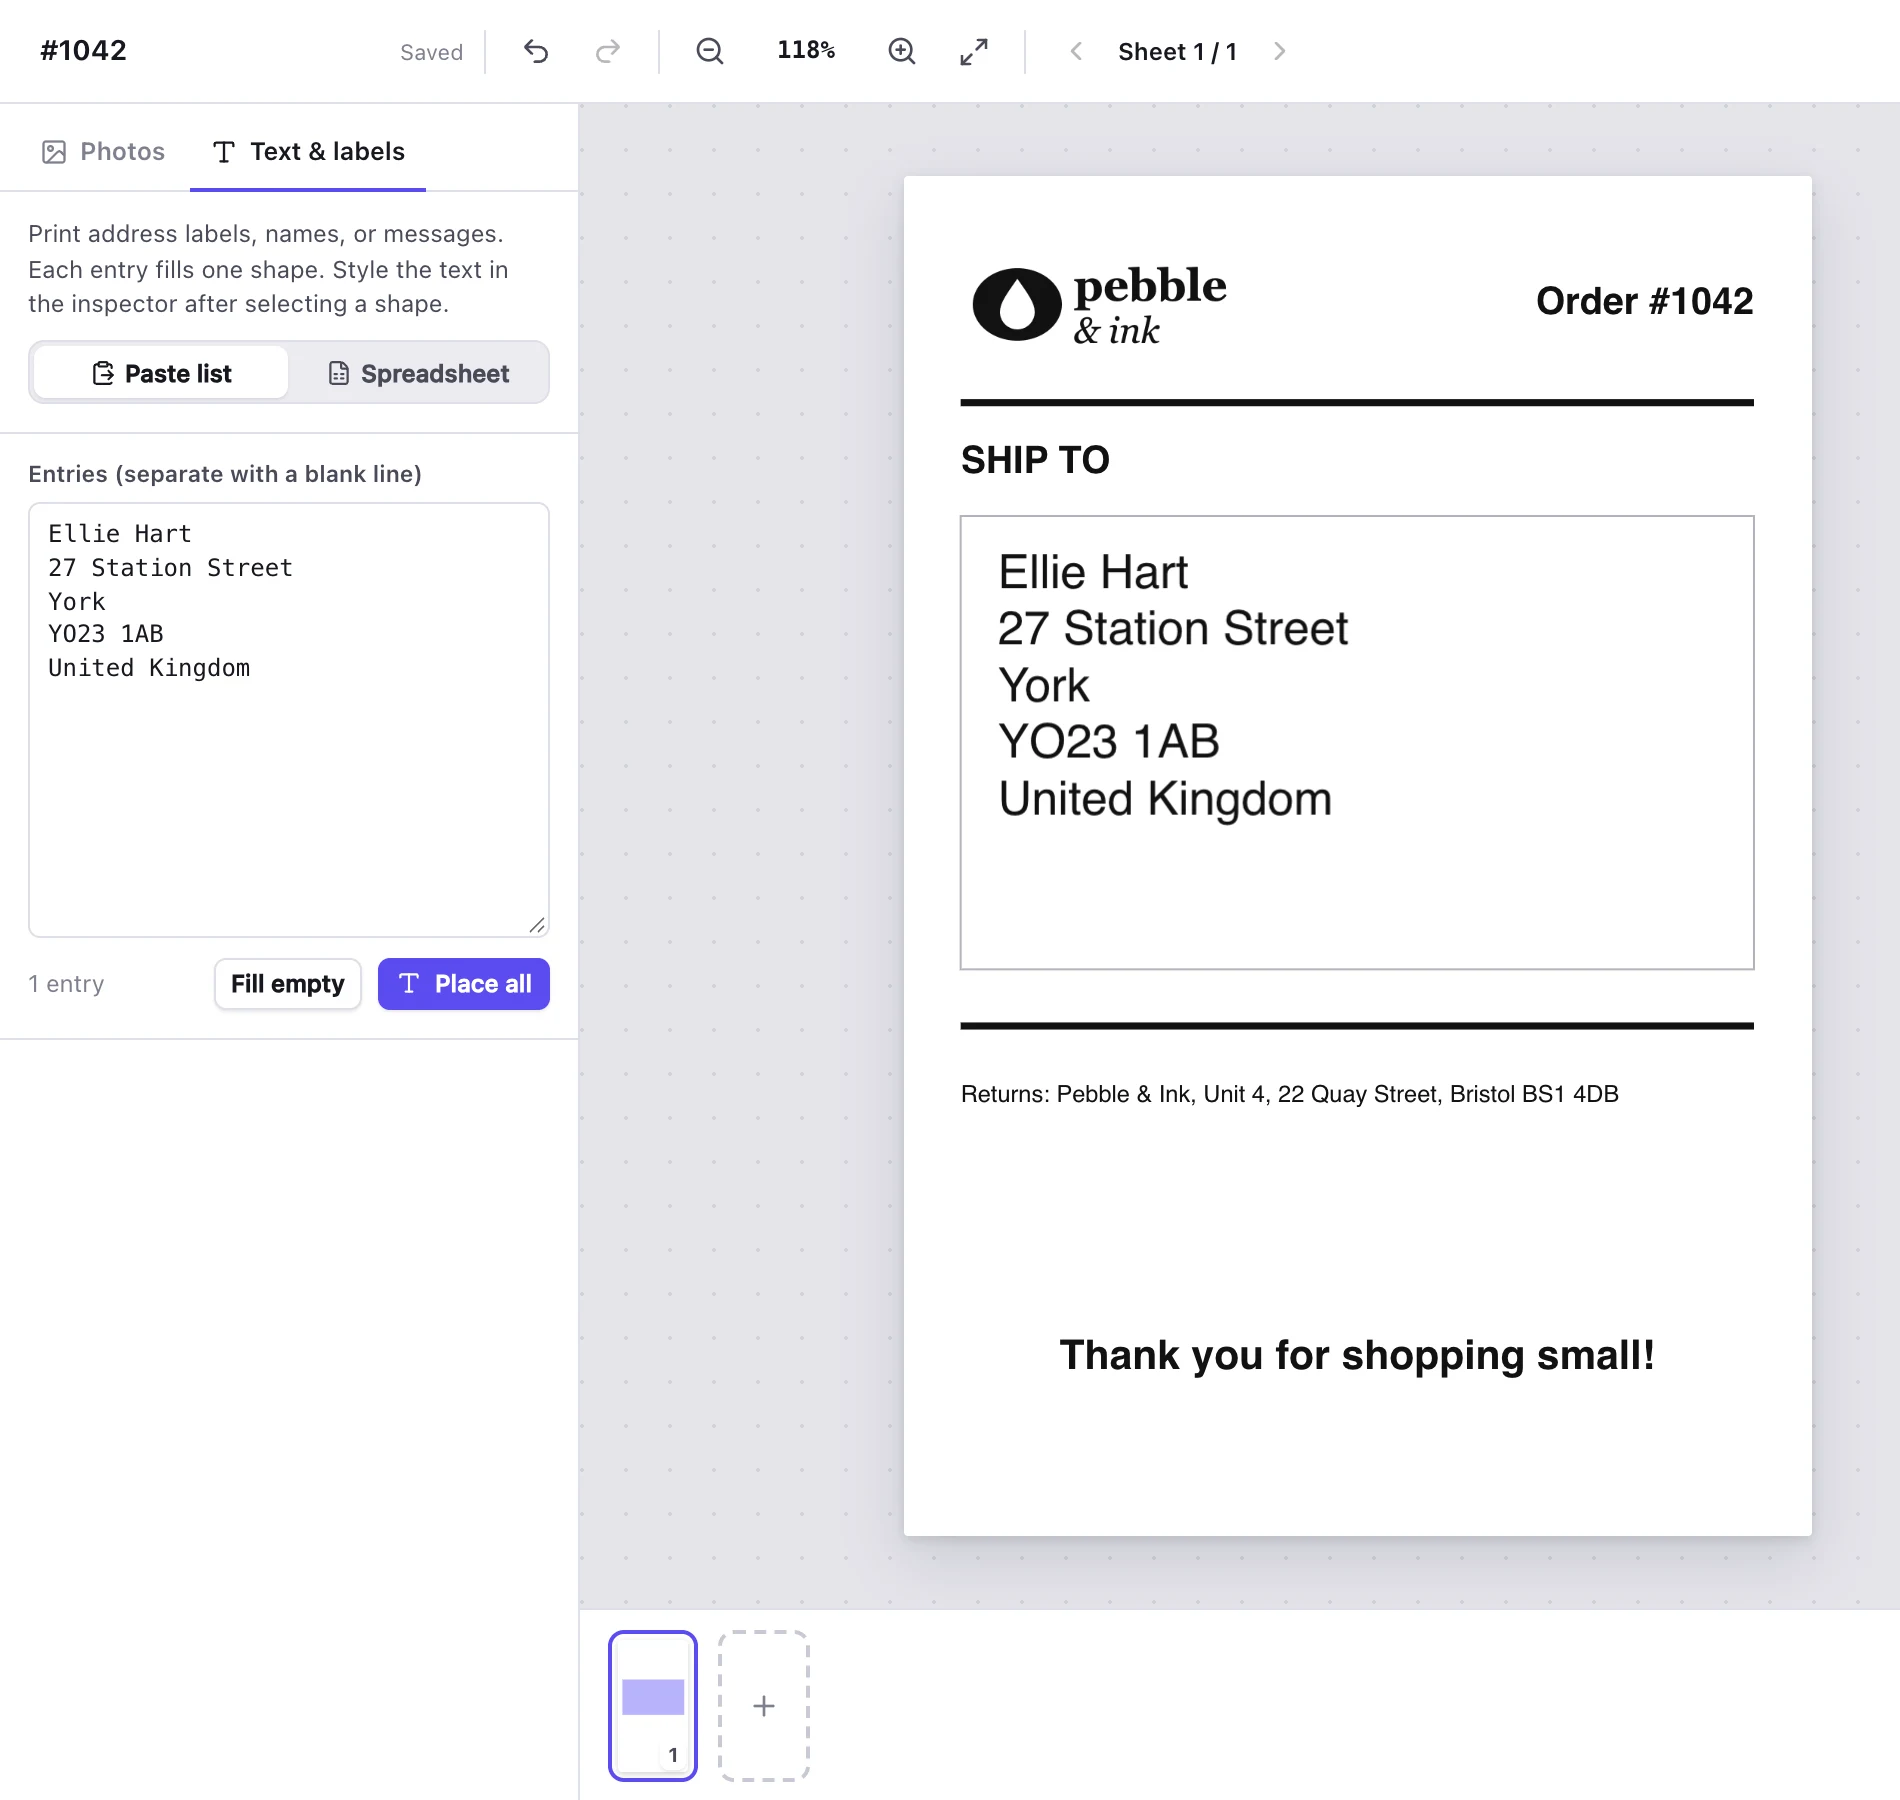
In a layout you print yourself, {$order} shows the layout’s name, so name the layout after the order (click its name at the top left). To make labels from an Etsy or Shopify spreadsheet instead, choose Spreadsheet → Import CSV: printing Etsy and Shopify addresses shows how to download one.
Can MagLab print a label for each Shopify order?
Yes. With MagLab Pro (or the free trial), MagLab can read paid orders from your Shopify shop and print them by itself, with an address label for each. The user guide explains connecting your shop, which you do once. Then, in Automate → Shopify, open your shop and go to Address labels:
- Switch on Also print an address label for each order.
- Choose your template as the Label template.
- Switch on Print labels and choose your label printer, or Save a PDF copy and choose a folder, or both.
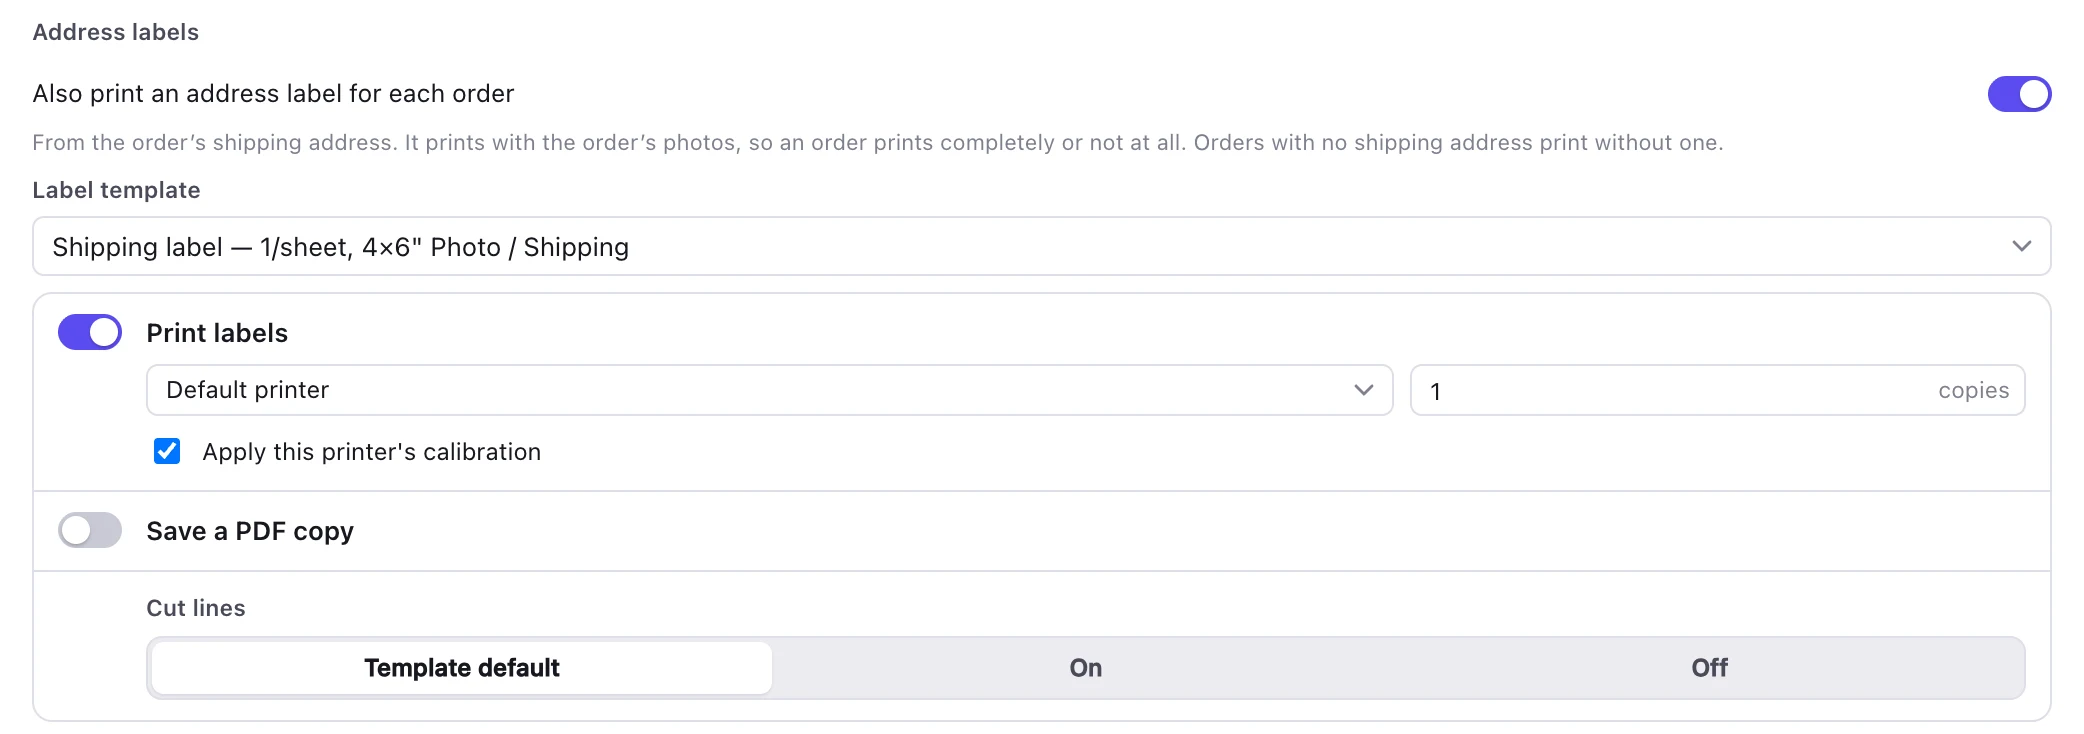
Each label takes the order’s shipping address: the name, company, street, town, region and postcode, and country, leaving out any that are empty. {$order} prints the order number as Shopify shows it, such as #1042, so there’s no need to type a # in front.
A few things worth knowing:
- Labels come with orders MagLab prints. An address label prints together with the order’s photos or designs, so each order prints completely or not at all. An order with nothing for MagLab to print, such as one for a gift card, doesn’t get a label.
- Check them first. With Print labels off and Save a PDF copy on, labels are saved as PDFs without printing anything, so you can see how they come out.
- Several labels on a sheet: on a sheet of labels, switch on Print several orders on the same sheets, and labels fill the sheet instead of using one sheet each.
- No addresses? Shopify may only share customers’ addresses with apps like MagLab on its Grow plan or higher. Which customer details an app can read is set by Shopify’s rules on protected customer data.
Or save a spreadsheet into a folder
If your orders come from somewhere else, MagLab can watch a folder instead. Go to Automate → Hot folders → Add hot folder, choose the folder and your label template, and choose whether to print, save a PDF or both. From then on, every CSV file saved in that folder becomes labels: one per row, or as many as a Quantity, Qty, Copies or Count column says.
MagLab works out which columns make up the address. To choose yourself, fill in CSV label layout with the columns in braces, such as {{Name}} and {{Address 1}}, one line each. {$order} prints the file’s name for these labels, so to print each row’s order number, add its column to the label layout.
Other shops can reach MagLab through an order feed or webhooks, where Also print for each order adds the address label. The user guide covers order feeds and webhooks.
How do you get the labels to line up?
Print at 100% on the right paper size, try one label first, and correct your printer if it’s still a little off.
- Set the paper size to 4 × 6” (or your label sheet’s size) in the printer’s settings, and print at 100% or “Actual size”, never “Fit to page”.
- Try one first. Print a single label, or a sheet on plain paper held up to the light against your labels.
- If it’s a little off, your printer is probably printing slightly out of position. Why prints don’t line up explains how MagLab measures it once and corrects every label after that.
If you’d rather design in Canva or another app, there’s a free 4 × 6” shipping label template, and label templates for 17 Avery sheets.