Why your prints don't line up with your cutter
Cut lines a millimetre or two off your artwork? What causes it, how to measure it with a ruler, and how to fix it for good.
By Ryan Soanes · Updated 22 October 2026
You print a sheet of stickers, cut them out with a trimmer, punch or cutting machine, and the cuts land slightly off: a white edge on one side, artwork clipped on the other. It’s rarely the cutter. Usually the printer isn’t putting the ink exactly where the file says, or the file isn’t being printed at its real size.
Is it the print settings?
Often, yes. Most “everything’s slightly too small” problems come from the print dialog, so check these before anything else:
- Scale. Print at 100% or “Actual size”. “Fit to page” and “Shrink to fit” make everything a few percent smaller, so a circle meant for a 2⅝” punch comes out too small for it. PDFs opened in a web browser or Preview often fit the page unless you change it.
- Borderless printing. Turn it off. To print to the very edge, the printer enlarges the page slightly, which moves and stretches everything.
- Paper size. Make the paper size in the print dialog match the paper in the tray. Printing an A4 file on US Letter, or the other way round, makes the printer shrink or shift it to fit.
How far out is a typical printer?
Even at 100%, most printers are a little out: a shift of 0.5–2 mm and a size error of 0.3–1% are normal, and they come from how each printer feeds paper. That’s enough to put a cut line through a small sticker.
To see how far out yours is, print one of the free templates at 100%, such as the 2” square sticker template, and measure it with a steel ruler marked in millimetres:
- Size. Measure one square edge to edge. It should be exactly 50.8 mm. If it’s 50.5 mm, the printer is printing about 0.6% too small.
- Position. Measure the gap between the left edge of the paper and the first square, then between the last square and the right edge. On that template the two gaps should match. If one is 1 mm bigger than the other, everything is shifted by half a millimetre. Do the same with the top and bottom gaps.
Measure along the longest distance you can, such as across a whole row, to see small size errors.
Measure down the page as well as across it. Rollers move the paper down the page while the print head moves across it, so the two directions are often out by different amounts.
How much does a small error matter?
More than it sounds, because a size error grows across the sheet. A printer that’s 0.6% small prints a 50.8 mm square 0.3 mm short, which you’d hardly see. Across 190 mm of an A4 or US Letter sheet, the same error adds up to 1.1 mm, so if the first sticker in a row is cut perfectly, the last one is cut 1.1 mm off. Add a 1 mm shift and the far side of the sheet can be 2 mm out.
| Size error | Over 50 mm | Over 100 mm | Over 200 mm |
|---|---|---|---|
| 0.3% | 0.15 mm | 0.3 mm | 0.6 mm |
| 0.6% | 0.3 mm | 0.6 mm | 1.2 mm |
| 1% | 0.5 mm | 1 mm | 2 mm |
This is why a sheet can look fine in one corner and wrong in the opposite one, and why moving the whole design by the same amount only fixes part of it.
Fix it for good
The alignment tools in most printer drivers line up the print head rather than the position of the page, so they rarely help with this. There are two practical fixes:
- Move your design to make up for it. If everything prints 1 mm too far right, shift your design 1 mm left before printing. It works, but you have to remember to do it for every file and every printer.
- Let your layout software correct it. MagLab does this with a calibration sheet: print it, measure four lines with a ruler and type them in. From then on MagLab corrects every sheet you print to that printer on that paper size, both its position and its size, and a check sheet confirms the result.
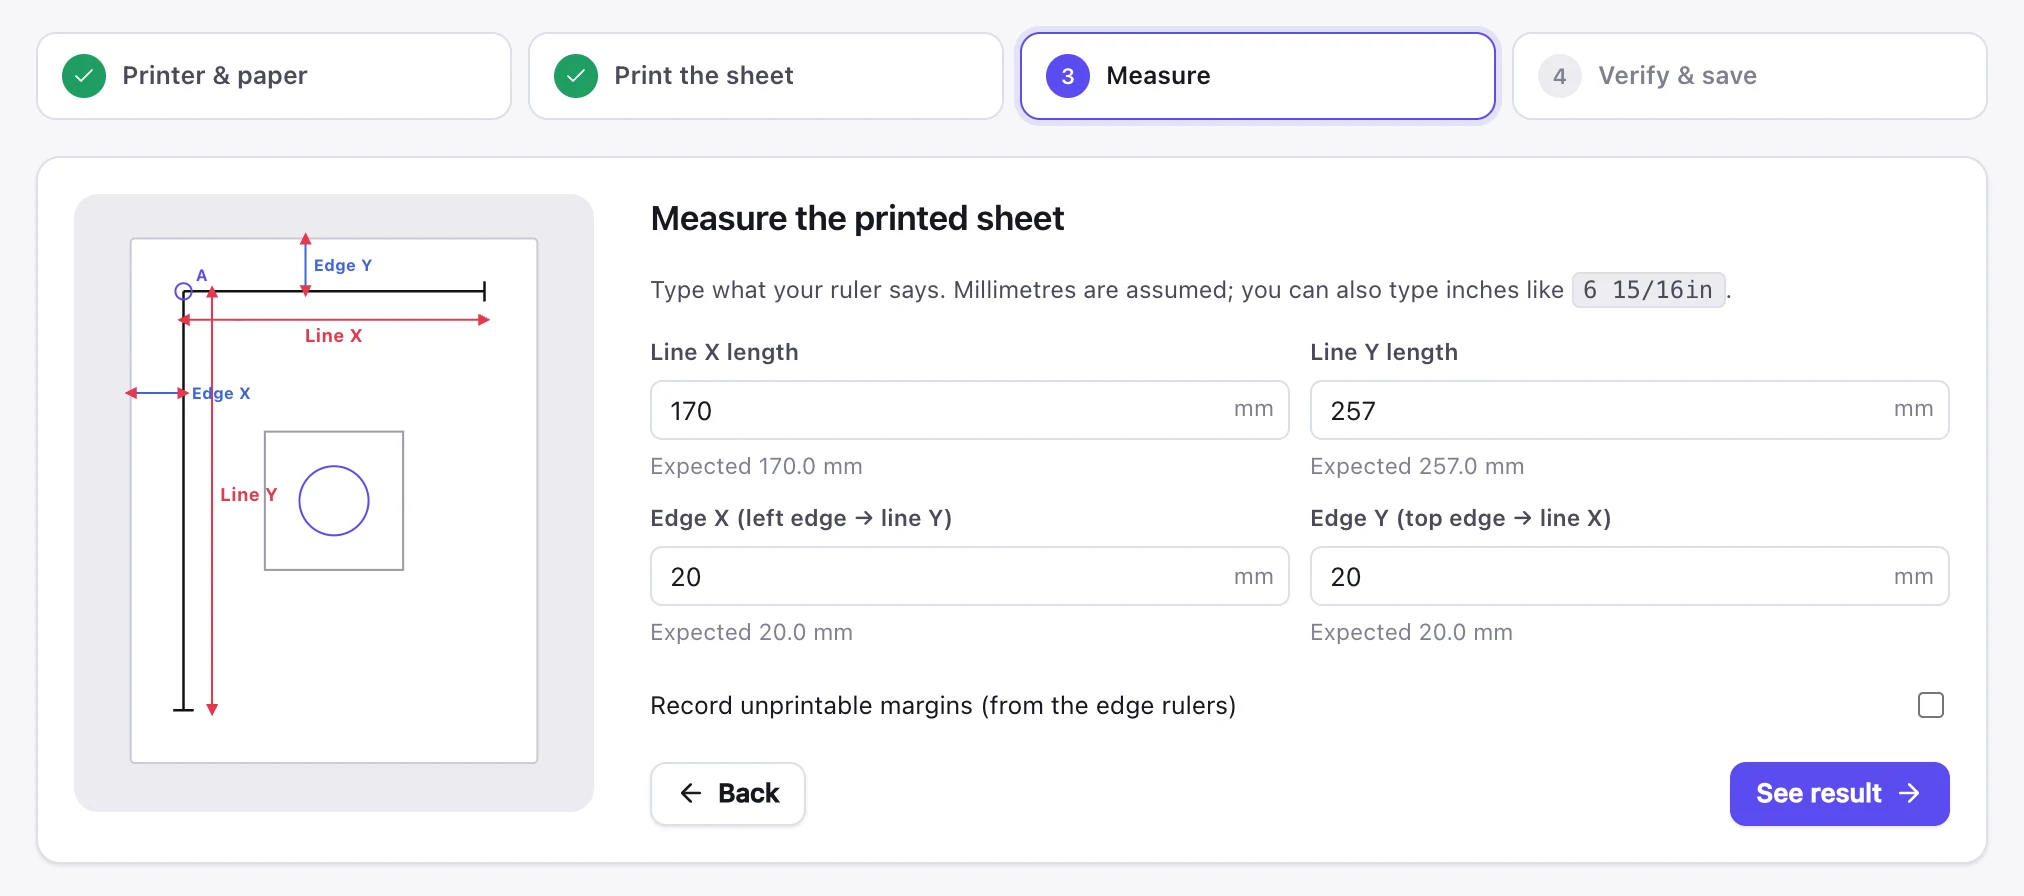
Cutting machines that read printed registration marks, such as a Cricut using Print Then Cut, find the marks and adjust their cuts to match. A printer that’s slightly out matters most for everything else: trimmers, punches, button cutters, and machines cutting without marks.
What if every sheet is out by a different amount?
Then the printer isn’t feeding the paper the same way each time, and no correction can fix that on its own, because a correction makes up for an error that stays the same. Make the feed steady first:
- Push the paper guides in the tray snug against the stack, without bending it.
- Load fewer sheets, and fan the stack before you put it in, so sheets don’t stick together.
- Use the rear or manual feed for sticker paper and card if your printer has one. Its paper path is straighter.
- Look for skew. If the gap down the left edge is bigger at the top than at the bottom, the paper went in at an angle. That’s a feeding problem too.
Once sheet after sheet measures the same, the printer is steady enough to correct.
If shapes near the edge of the sheet come out clipped, that’s a different problem: printers can’t print the outer few millimetres of the paper. Move those shapes inwards. In MagLab, record your printer’s margins while calibrating, and the Designer warns about shapes that reach into them.
Do you need to measure again for different paper?
Yes, if you change the paper type or the tray. Different papers feed slightly differently. If you switch from plain paper to sticker paper, photo paper or card, or use a different tray, measure again. In MagLab, calibrate once for each printer and paper size, and again if you change the paper type, tray or printer driver.