User guide
Photos, text and labels
What you can do on the Layout screen once your photos are on the sheet: adjust them, add text and addresses, and save sheets to print again.
Keyboard shortcuts are shown for Mac. On Windows and Linux, use Ctrl for ⌘ and Alt for ⌥.
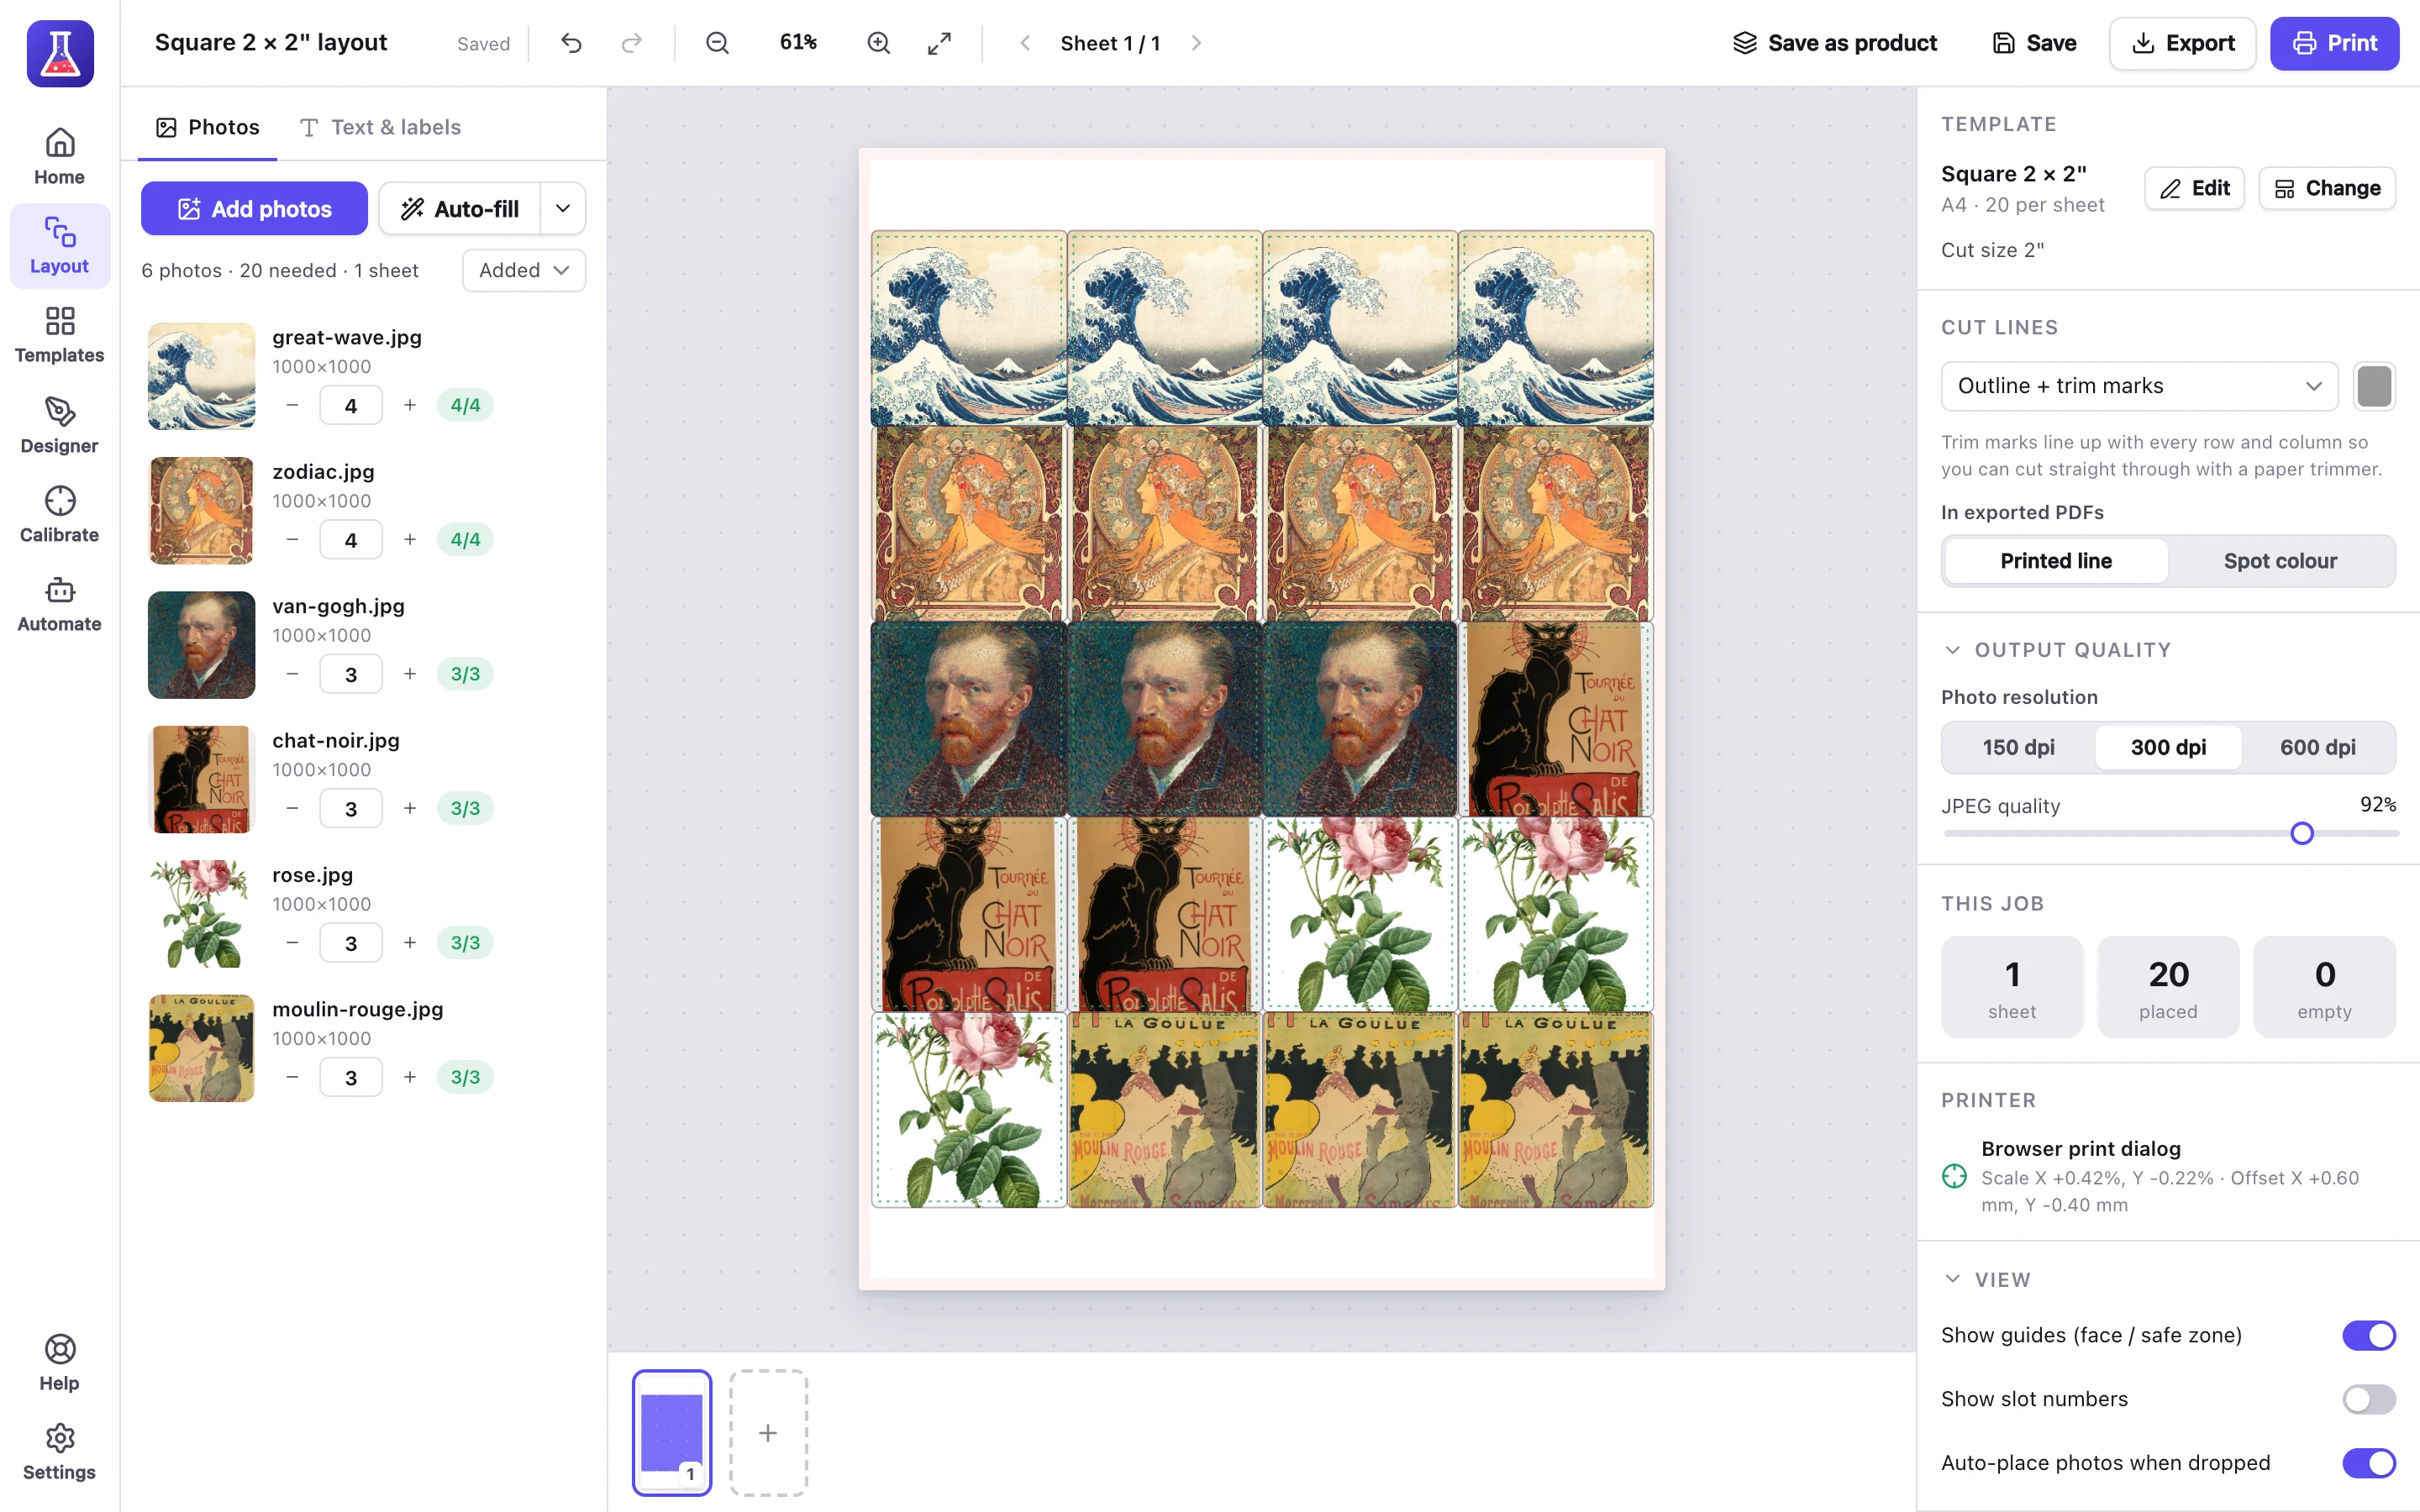
The Layout screen has three parts: your photos on the left, the sheet in the middle, and settings on the right.
Adjust photos on the sheet
Click a shape to select it. Then:
- Drag to move the photo inside the shape.
- Hold ⌥ and scroll to zoom.
- Use the panel on the right to rotate, flip or fit the photo.
| To… | Do this |
|---|---|
| Put a photo in one exact shape | Drop it onto that shape |
| Swap two shapes’ photos | Drag a filled shape onto another |
| Copy a photo to another shape | Hold ⌥ while dropping |
| Fill this sheet’s empty shapes with one photo | Double-click the photo in the Photos list |
| Select several shapes | ⇧-click or ⌘-click them, or ⌘A for all |
| Nudge a photo inside its shape | Arrow keys (hold ⇧ for bigger steps) |
| Turn a photo 90° | R (⇧R turns it the other way) |
| Empty the selected shapes | Delete |
| Undo or redo | ⌘Z or ⇧⌘Z |
Photo colour
Select a photo and open Colour in the right-hand panel to change its brightness, contrast and saturation. Use for every photo in this job copies the settings to the rest.
Resolution warnings
An amber ! on a shape means the photo has too few pixels to print sharply at that size. The limit is 200 dpi (dots per inch), and you can change it in Settings. Select the shape to see its exact resolution.
Add text, names and addresses
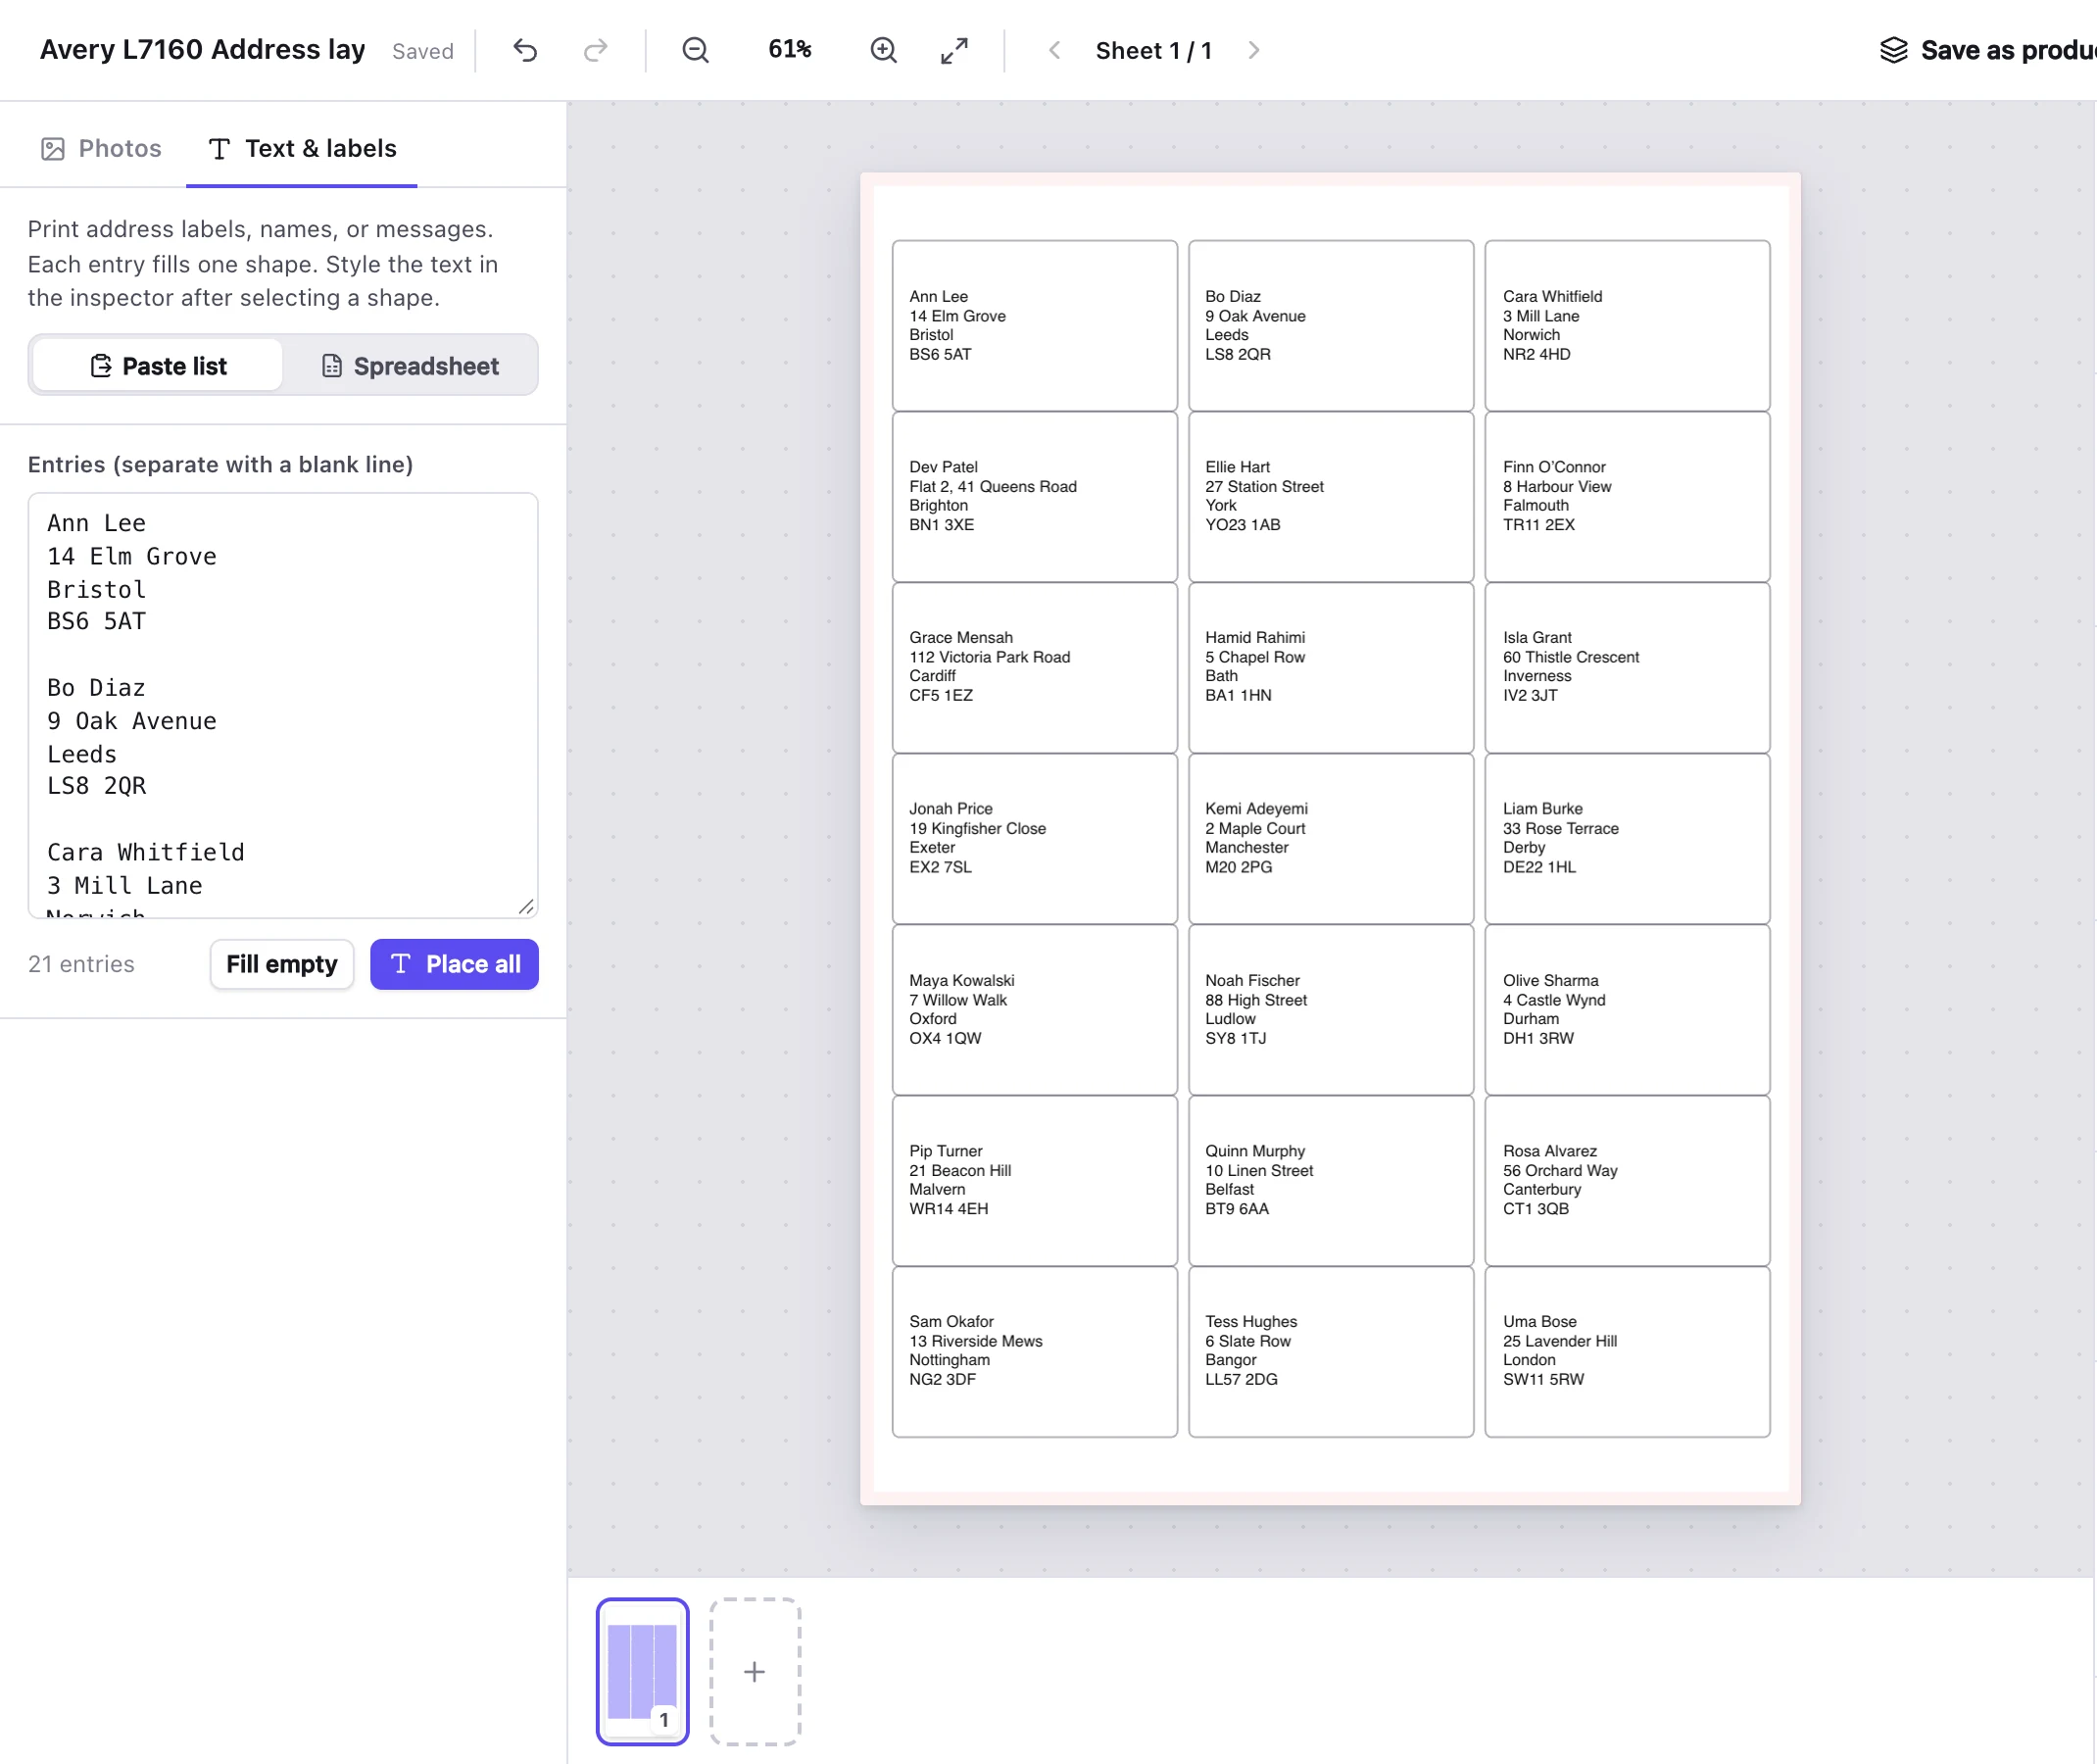
Pick the way that matches what you have:
- A few words: select the shapes and type in Text in the right-hand panel.
- A list of names or addresses: open the Text & labels tab (next to Photos) and click Paste list. Leave a blank line between entries. Each entry goes on its own label.
- A spreadsheet: click Text & labels → Spreadsheet → Import CSV. Shopify, Etsy and spreadsheet apps can all save a CSV file.
On round shapes, Arc top and Arc bottom curve the text around the edge. On pin-back buttons, text stays inside the visible face.
Addresses from a spreadsheet
MagLab guesses an address layout from the column names. To change it, edit the layout:
{{Column}}stands for a column’s value. Clicking a column’s name inserts it.- Lines that come out empty are left out, so a missing “Address 2” doesn’t leave a gap.
Font, size and position
Select a shape and choose its font, size, colour and position under Text in the right-hand panel. Use this style for all text gives every shape the same style.
These settings belong to the shape in the template. They are used on every sheet, and in new layouts, saved products and automated orders that use the template. With a built-in template they stay in that layout only.
Save and export
MagLab saves your layout as you go. Recent layouts are on Home.
- Save (⌘S) writes a project file you can keep or move to another computer.
- Export (⌘E) makes a PDF, a PNG or a cut file instead of printing.
Saved products
A saved product is a layout you print again whenever it sells, such as a sheet of stickers with twelve different designs. Several saved products can use the same template.
- Save one: lay the sheets out, then click Save as product in the toolbar. Give it a name and, if you like, the SKU (the code your shop uses for it).
- Print one: open Templates → Products and click it. It opens as a new layout, ready to print. Set the number of copies when you print.
- Change one: change the layout, then choose Product → Update the product with these sheets in the toolbar, or Save as a new product…. Until you do, the saved product stays as it was.
A saved product always prints on the current version of its template. A logo you add to the template later appears on every saved product that uses it.
Automation can print saved products too, by name or SKU.
Change the template from a layout
Click Edit next to the template’s name in the right-hand panel. The template opens in the Designer. Make your changes and click Done to come back to your layout. The back arrow comes back without the changes.
- Photos stay in their shapes, and keep their crop unless the shape changed size.
- Photos from shapes you removed move to the first empty shapes.
- Done also saves the template in your library. A built-in template is saved as your own copy.
Next
- Die-cut stickers: stickers cut round each design, packed tightly.
- Templates: make your own sheet, or import one.
- Automation: print orders by themselves.