User guide
Templates
A template is the sheet: the paper size and the size and position of every shape. Use a built-in one, make your own in the Designer, or import one you already have.
Keyboard shortcuts are shown for Mac. On Windows and Linux, use Ctrl for ⌘ and Alt for ⌥.
Built-in templates
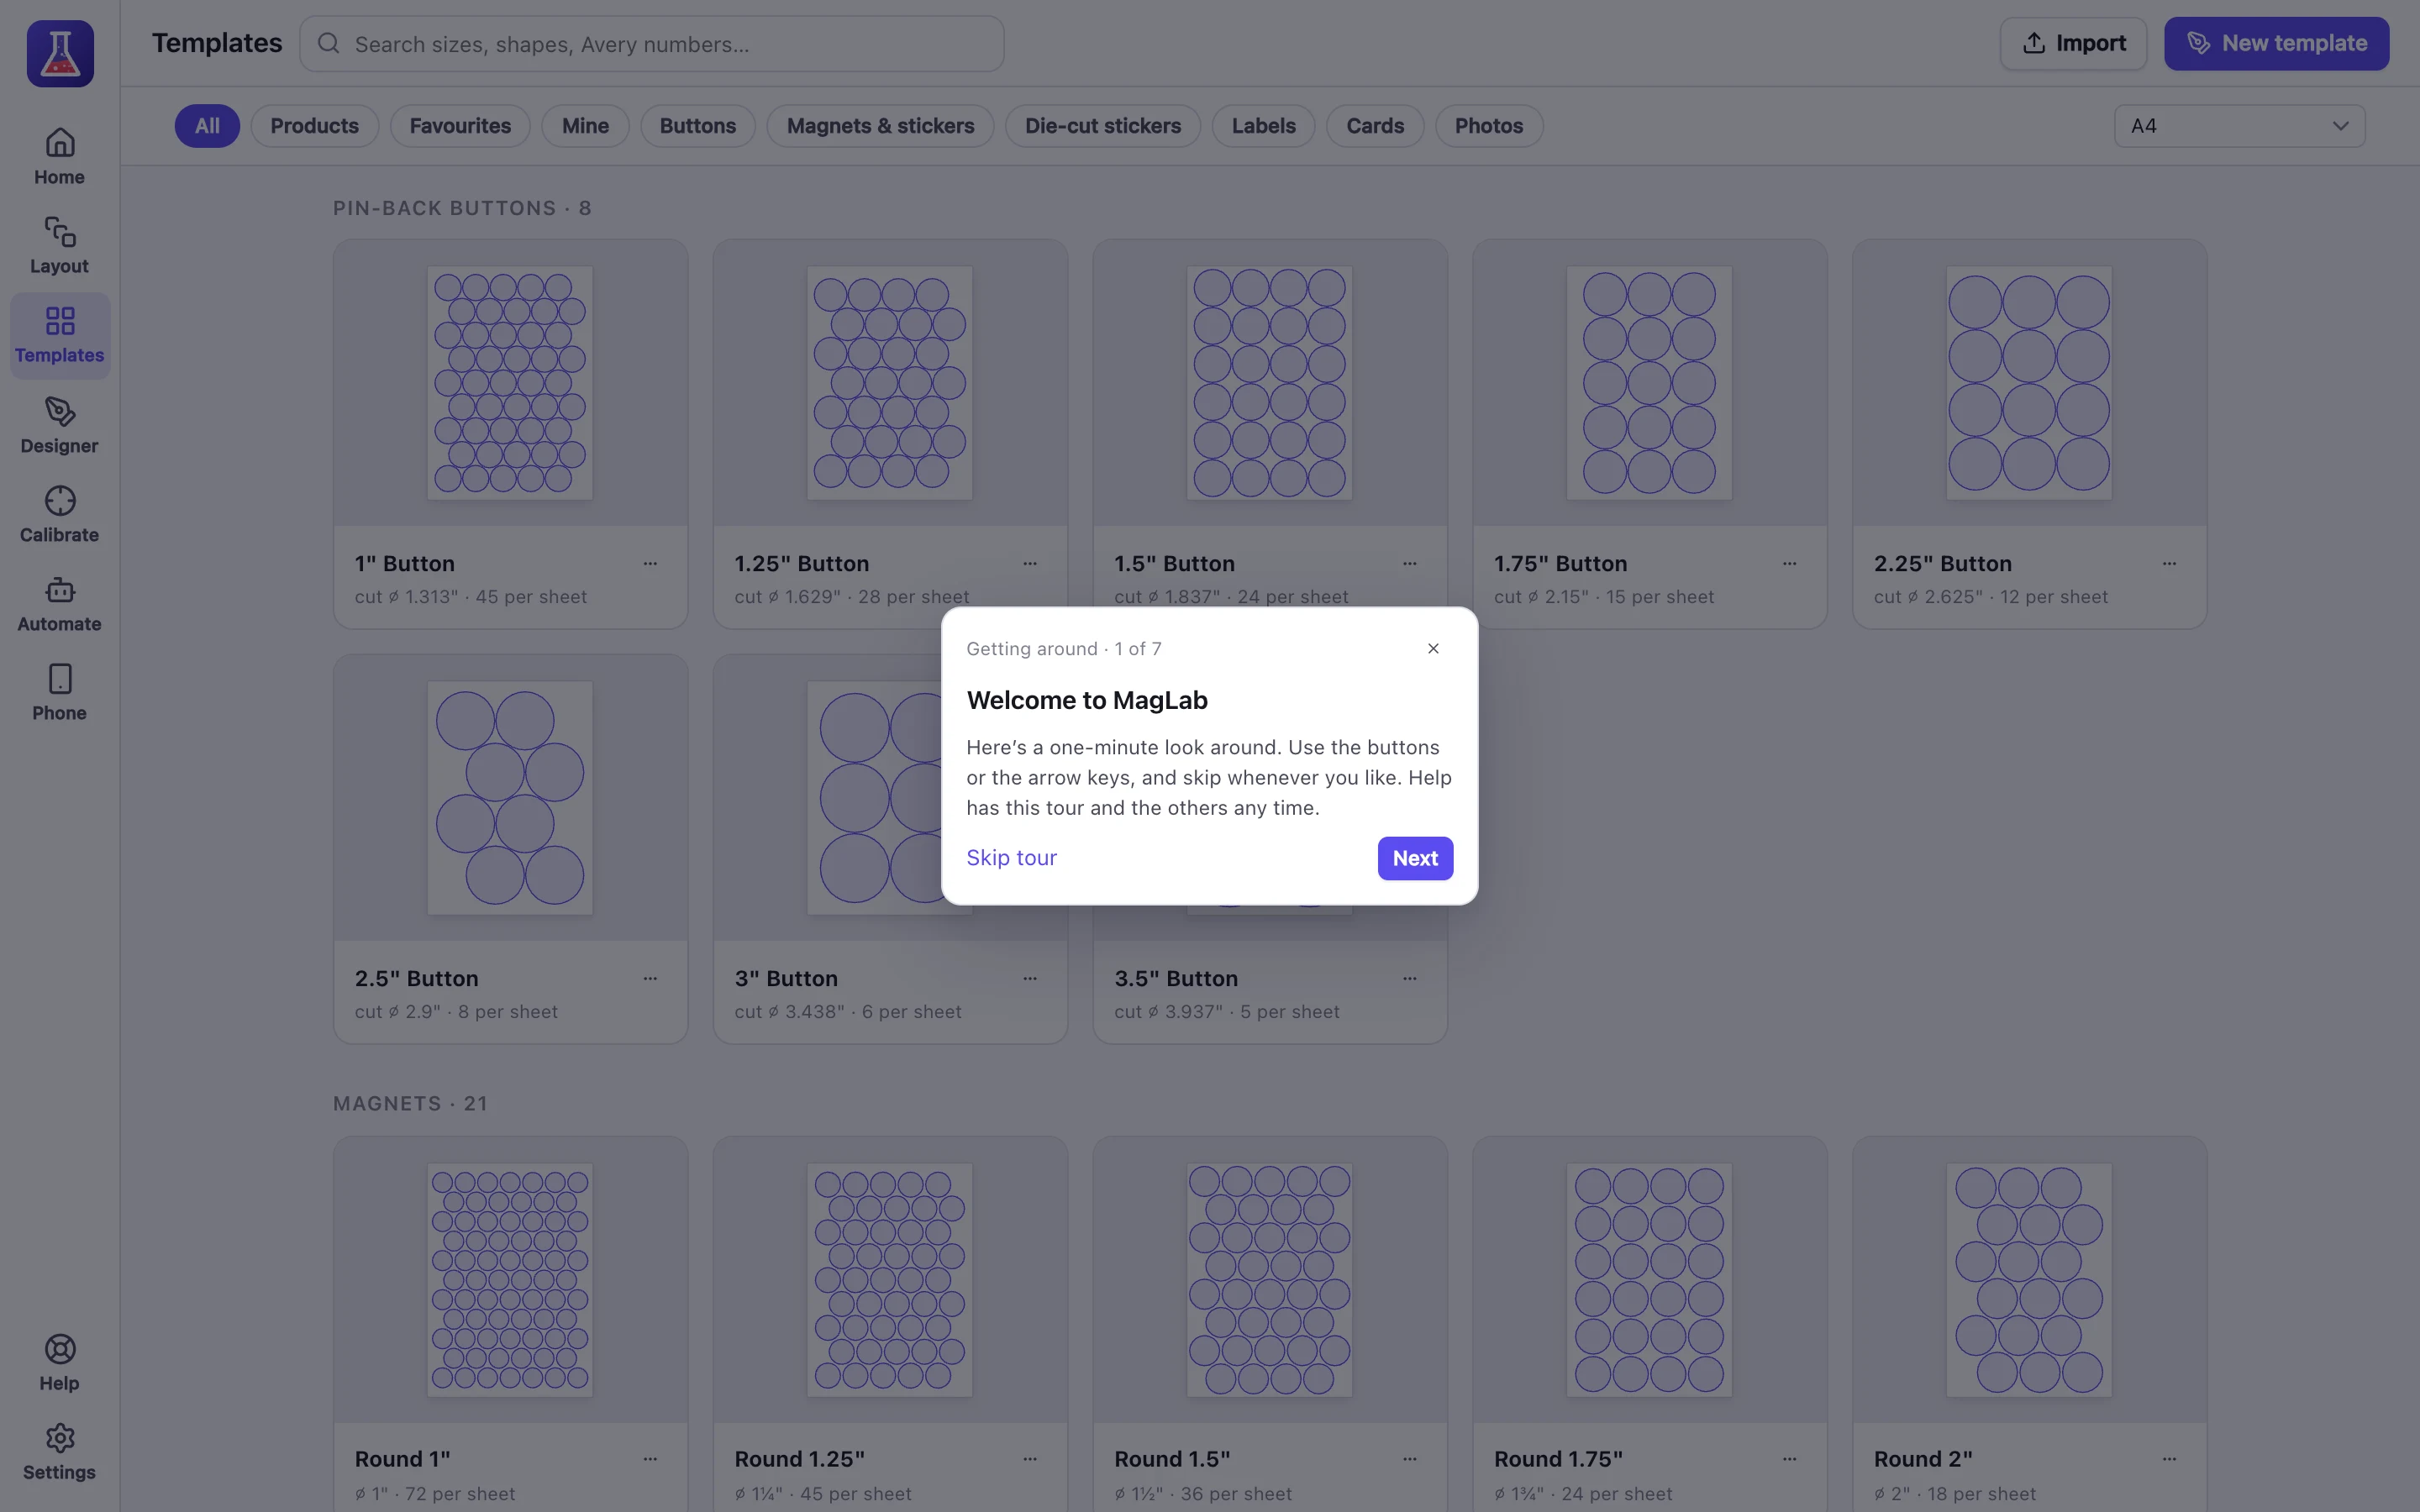
Templates lists every built-in sheet: buttons, magnets, stickers, labels, cards and photo prints. To change one, choose Customise a copy.
Button templates list both the finished face and the cut circle. A 2¼” button needs a 2⅝” circle of paper to wrap around the shell. Cut sizes vary slightly between button makers (American Button Machines, Tecre, Badge-A-Minit and others), so check your press’s instructions. To change the cut size, use Pin-back button size in the Designer.
The Templates screen shows every paper size to start with. To start on your default paper instead, choose Settings → Templates screen shows → Default paper.
Make a template in the Designer
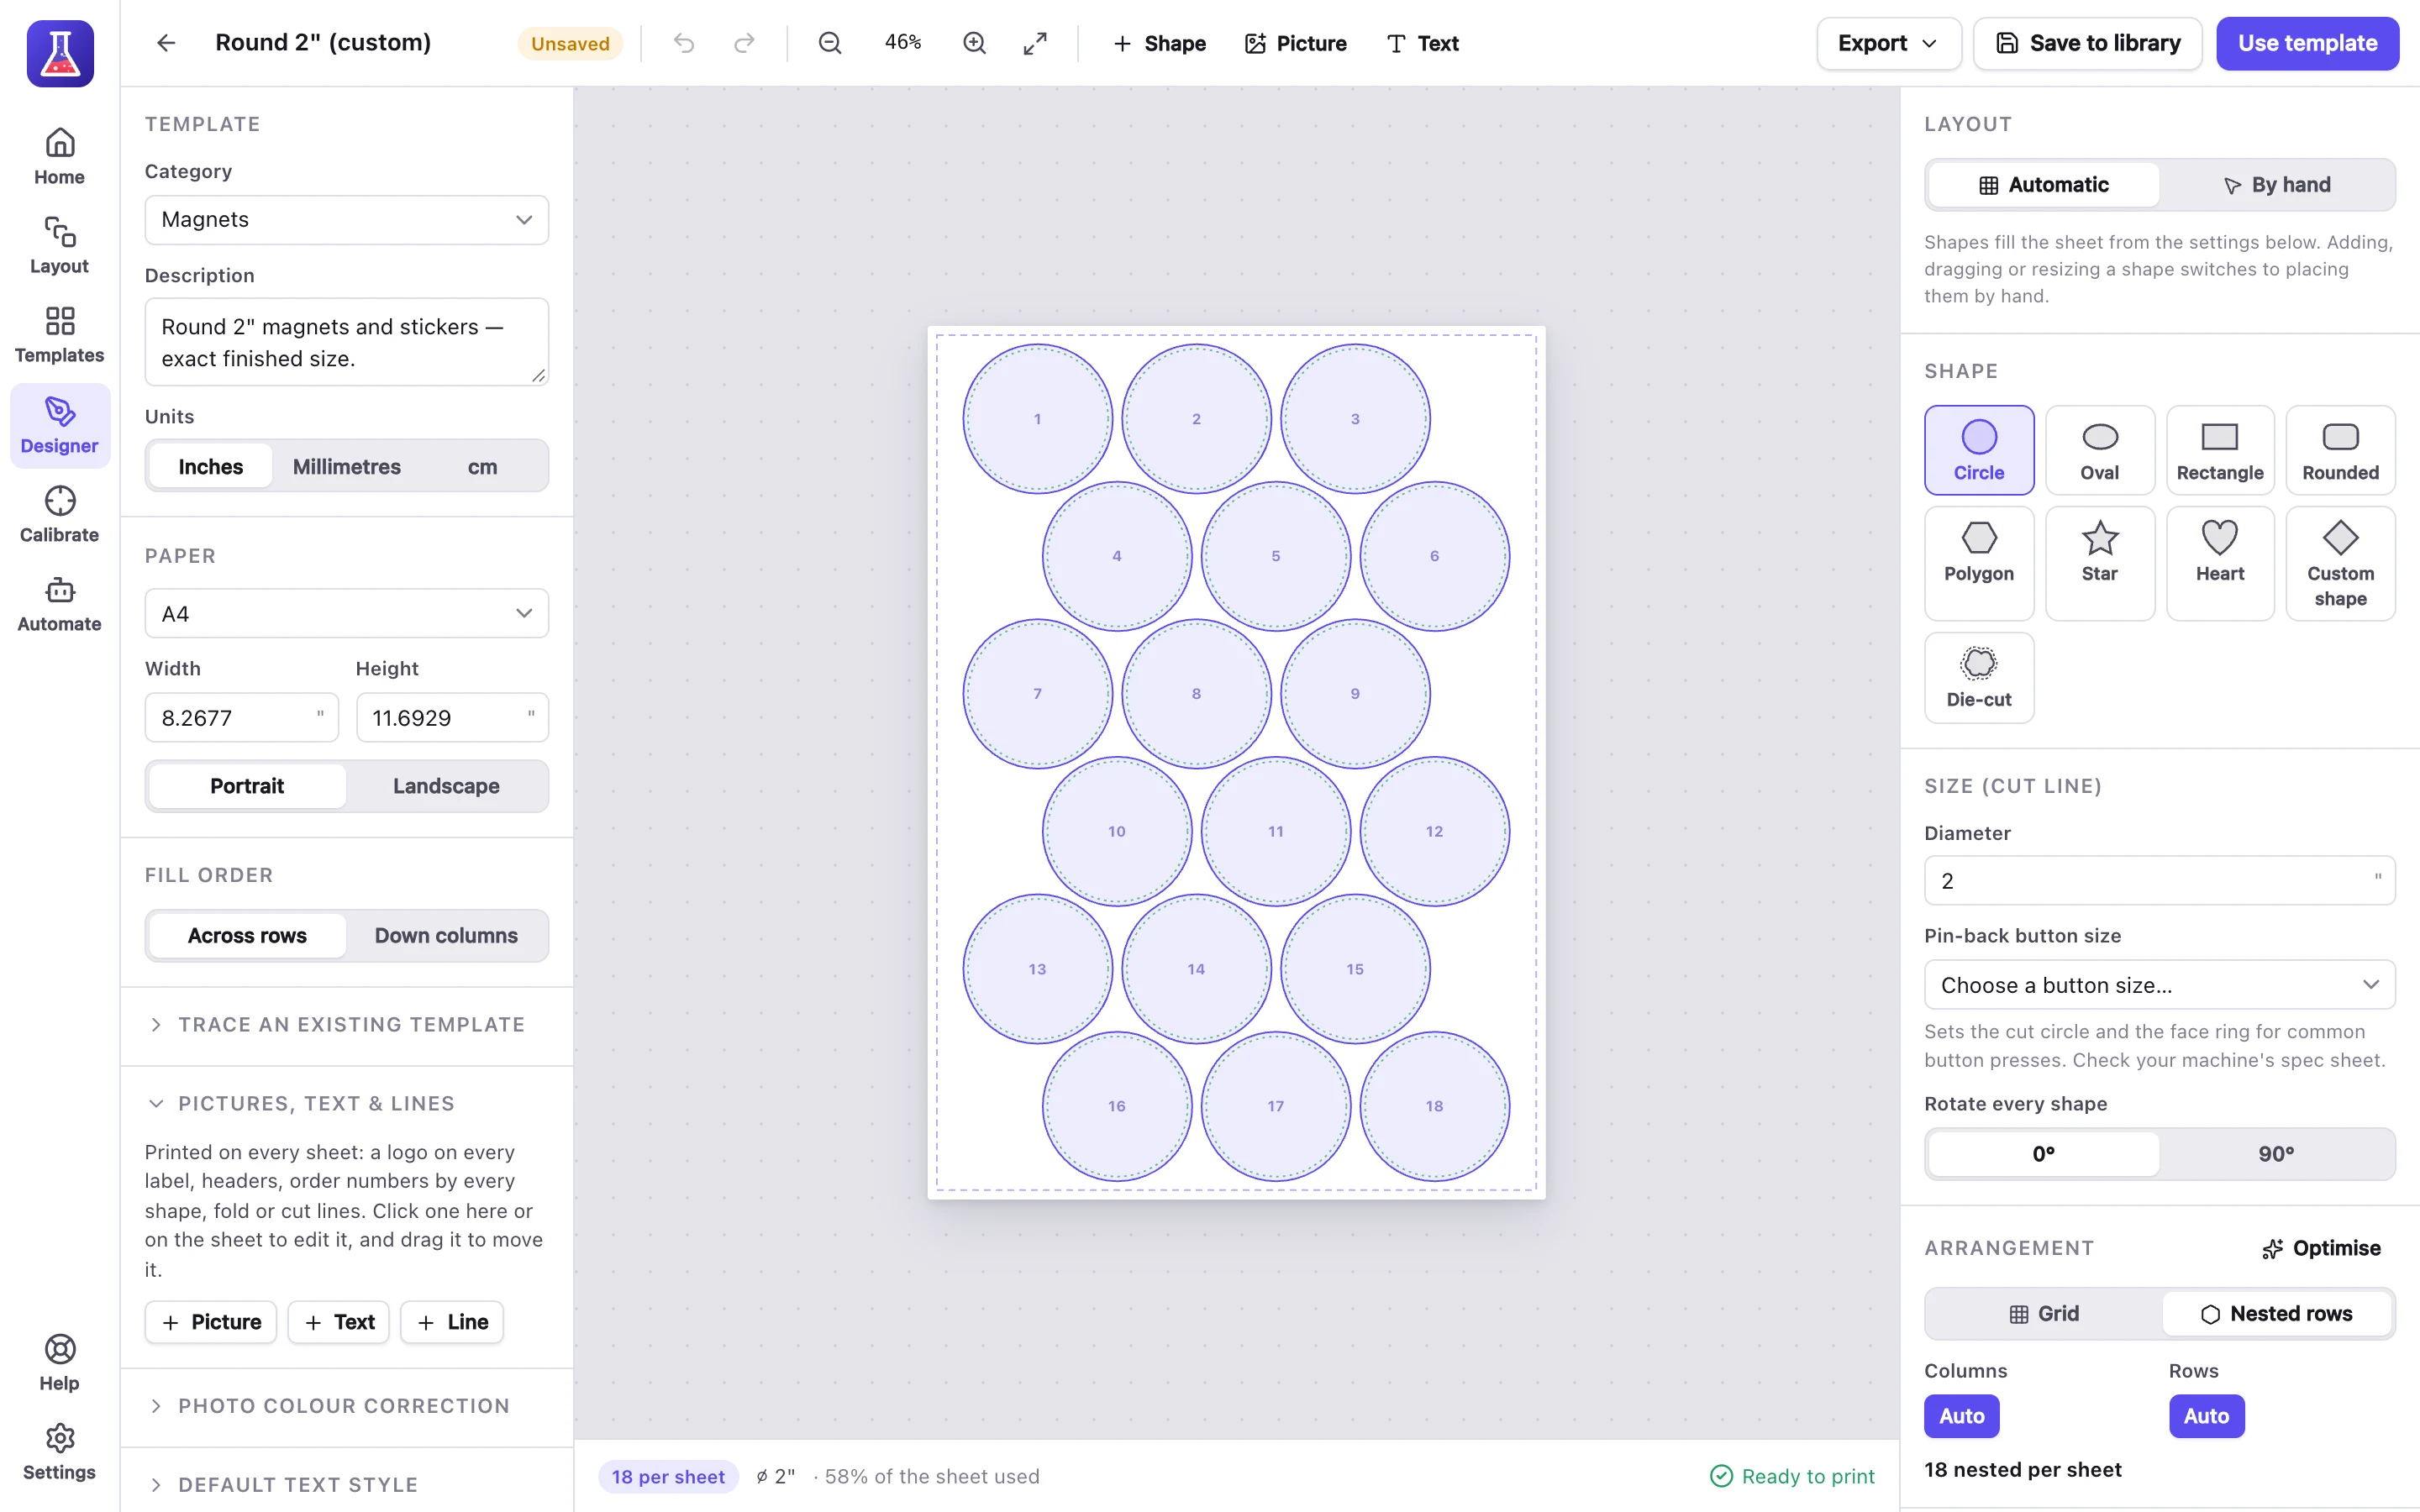
- Click Designer.
- Choose the paper on the left.
- Choose a shape and type its size on the right. MagLab fills the sheet with as many as fit.
- Click Save to library, or Use template to start a layout with it.
The bar at the bottom checks the template as you work. It warns about shapes that overlap, run off the page, or reach into the edges your printer can’t print (once you’ve recorded them while calibrating).
Automatic or by hand
The switch is at the top of the right-hand panel when nothing is selected.
- Automatic fills the sheet with shapes from the settings below it.
- By hand keeps every shape where you put it.
Adding, dragging or resizing a shape switches to By hand. MagLab says so, with a Back to automatic button, which restores the automatic layout as it was.
Shape, size and arrangement
- Sizes: type them in any unit.
2 5/8,2-5/8",66.7mmand3in - 1/8all work. - Grid lines shapes up in rows and columns.
- Nested rows offsets every other row, which usually fits 10–20% more circles.
- Optimise tries every arrangement and rotation and lists them by how many fit.
- A spacing of
0gives shared cut lines: one cut with a trimmer separates two rows.
Bleed and guides
- Bleed extends the artwork past the cut line, so a slightly-off cut doesn’t leave a white edge.
- Face and safe zone show what will be visible on a button.
Placing shapes by hand
- Double-click the sheet to add a shape.
- Drag a shape to move it. Shapes snap to a 1/32” (or 0.5 mm) grid. Hold ⌥ to move them freely.
- Drag the handles on a shape’s corners and sides to resize it. The opposite side stays put. Hold ⇧ to keep its proportions.
- Select several shapes to line them up with each other (such as a row along its top edges) or space them evenly. MagLab warns, with Undo, if that stacks shapes on top of each other.
Cut lines
Cut lines → Lines between columns/rows draws full-length lines through the middle of each gap. Each line is one straight trimmer cut.
Export a template
Export saves the template as:
- a MagLab template (.mltpl) to share or back up
- a PDF or SVG template with guides
- a Transparent PNG guide overlay to design on in Canva
- a Cut file (SVG) for Cricut, Silhouette or a laser cutter
For stickers cut round each design, see Die-cut stickers.
Add a logo, header or text to every sheet
Pictures, text & lines in the Designer prints the same picture, text or lines on every sheet. Add them with Picture and Text in the toolbar, or in the panel on the left.
Each one is either:
- On every sheet: printed once per sheet, placed from the page’s top-left corner. Use it for a header.
- By every shape: repeated by every shape, or only by shapes with a photo or text. It is placed from the shape’s top-left corner. Use negative values to go above or left of the shape.
Pictures
- Use PNG (transparency is kept), JPEG, WebP, GIF or SVG.
- Drop a picture file on a shape to put it by every shape, or elsewhere on the sheet to print it once per sheet.
- A picture prints on top of photos and text. Tick Behind photos and text to put it behind them, and lower its opacity for a watermark.
- The picture is saved inside the template, so it goes with exported templates, saved layouts and automated jobs.
- MagLab warns when a picture is too small for the size it prints at.
A logo beside an address: put the picture by every shape, at the left of the label, then click Keep text clear of it. Addresses then start beside the logo.
Moving pictures, text and lines
Click one to select it and drag it to move it. It snaps to the grid, and to the middle of the page or shape. Hold ⌥ to move it freely.
- Drag a picture’s corner to resize it (hold ⇧ to stretch it).
- Drag a line’s ends to reshape it.
- Double-click text to edit it.
- Arrow keys nudge, ⌘D duplicates and ⌫ deletes.
Set the rotation to 180° for text on a flap that folds behind a magnet.
Words that fill themselves in
Words in braces are filled in when the sheet prints. For example, a header of Order {$reference} · page {$page} of {$pages} prints as “Order #1042 · page 1 of 2”.
| You type | It prints |
|---|---|
{$reference} |
The order number, or the layout’s name |
{$page} and {$pages} |
The sheet’s number, and how many sheets there are |
{$slot} |
The shape’s number |
{$order} |
By every shape: the order that shape is for, when orders share a sheet. Once per sheet: the orders on that sheet |
{$date} |
Today’s date |
{customer.name} |
For automated orders, any detail of the order |
The Designer previews order details as ‹field›. The API reference has the full list.
Text style and photo colour for the whole template
- Default text style sets the size, padding, indents and position of text in every shape. To place one shape’s text differently, select the shape and choose Text across and Text down under Text on the right.
- Photo colour correction adjusts every photo printed with the template, including automated orders. For example, add saturation and contrast for magnets under a clear film.
Import a template
Click Templates → Import, or drag files onto the template library.
| File | What MagLab does |
|---|---|
.mltpl |
Opens a MagLab template. |
| SVG | Brings in circles, ellipses, rectangles, polygons and paths at their real size. Canva’s 816 × 1056 px pages are recognised as US Letter. |
| PDF, PNG or JPG | Finds every shape to cut, such as on a blank template downloaded from Canva. It recognises rounded corners and button face rings, and rounds sizes to clean fractions. |
Check an imported template in the Designer before printing a big batch.
Next
- Die-cut stickers: stickers cut round each design, packed tightly.
- Automation: print orders by themselves from a folder, a website or another program.
- Shopify: print your Shopify orders by themselves.
- Help: licence keys, updates and fixes for common problems.