User guide
Die-cut stickers
A die-cut sticker is cut round its design, with an even border. MagLab works out each cut line, then packs the stickers onto the sheet as tightly as their outlines allow.
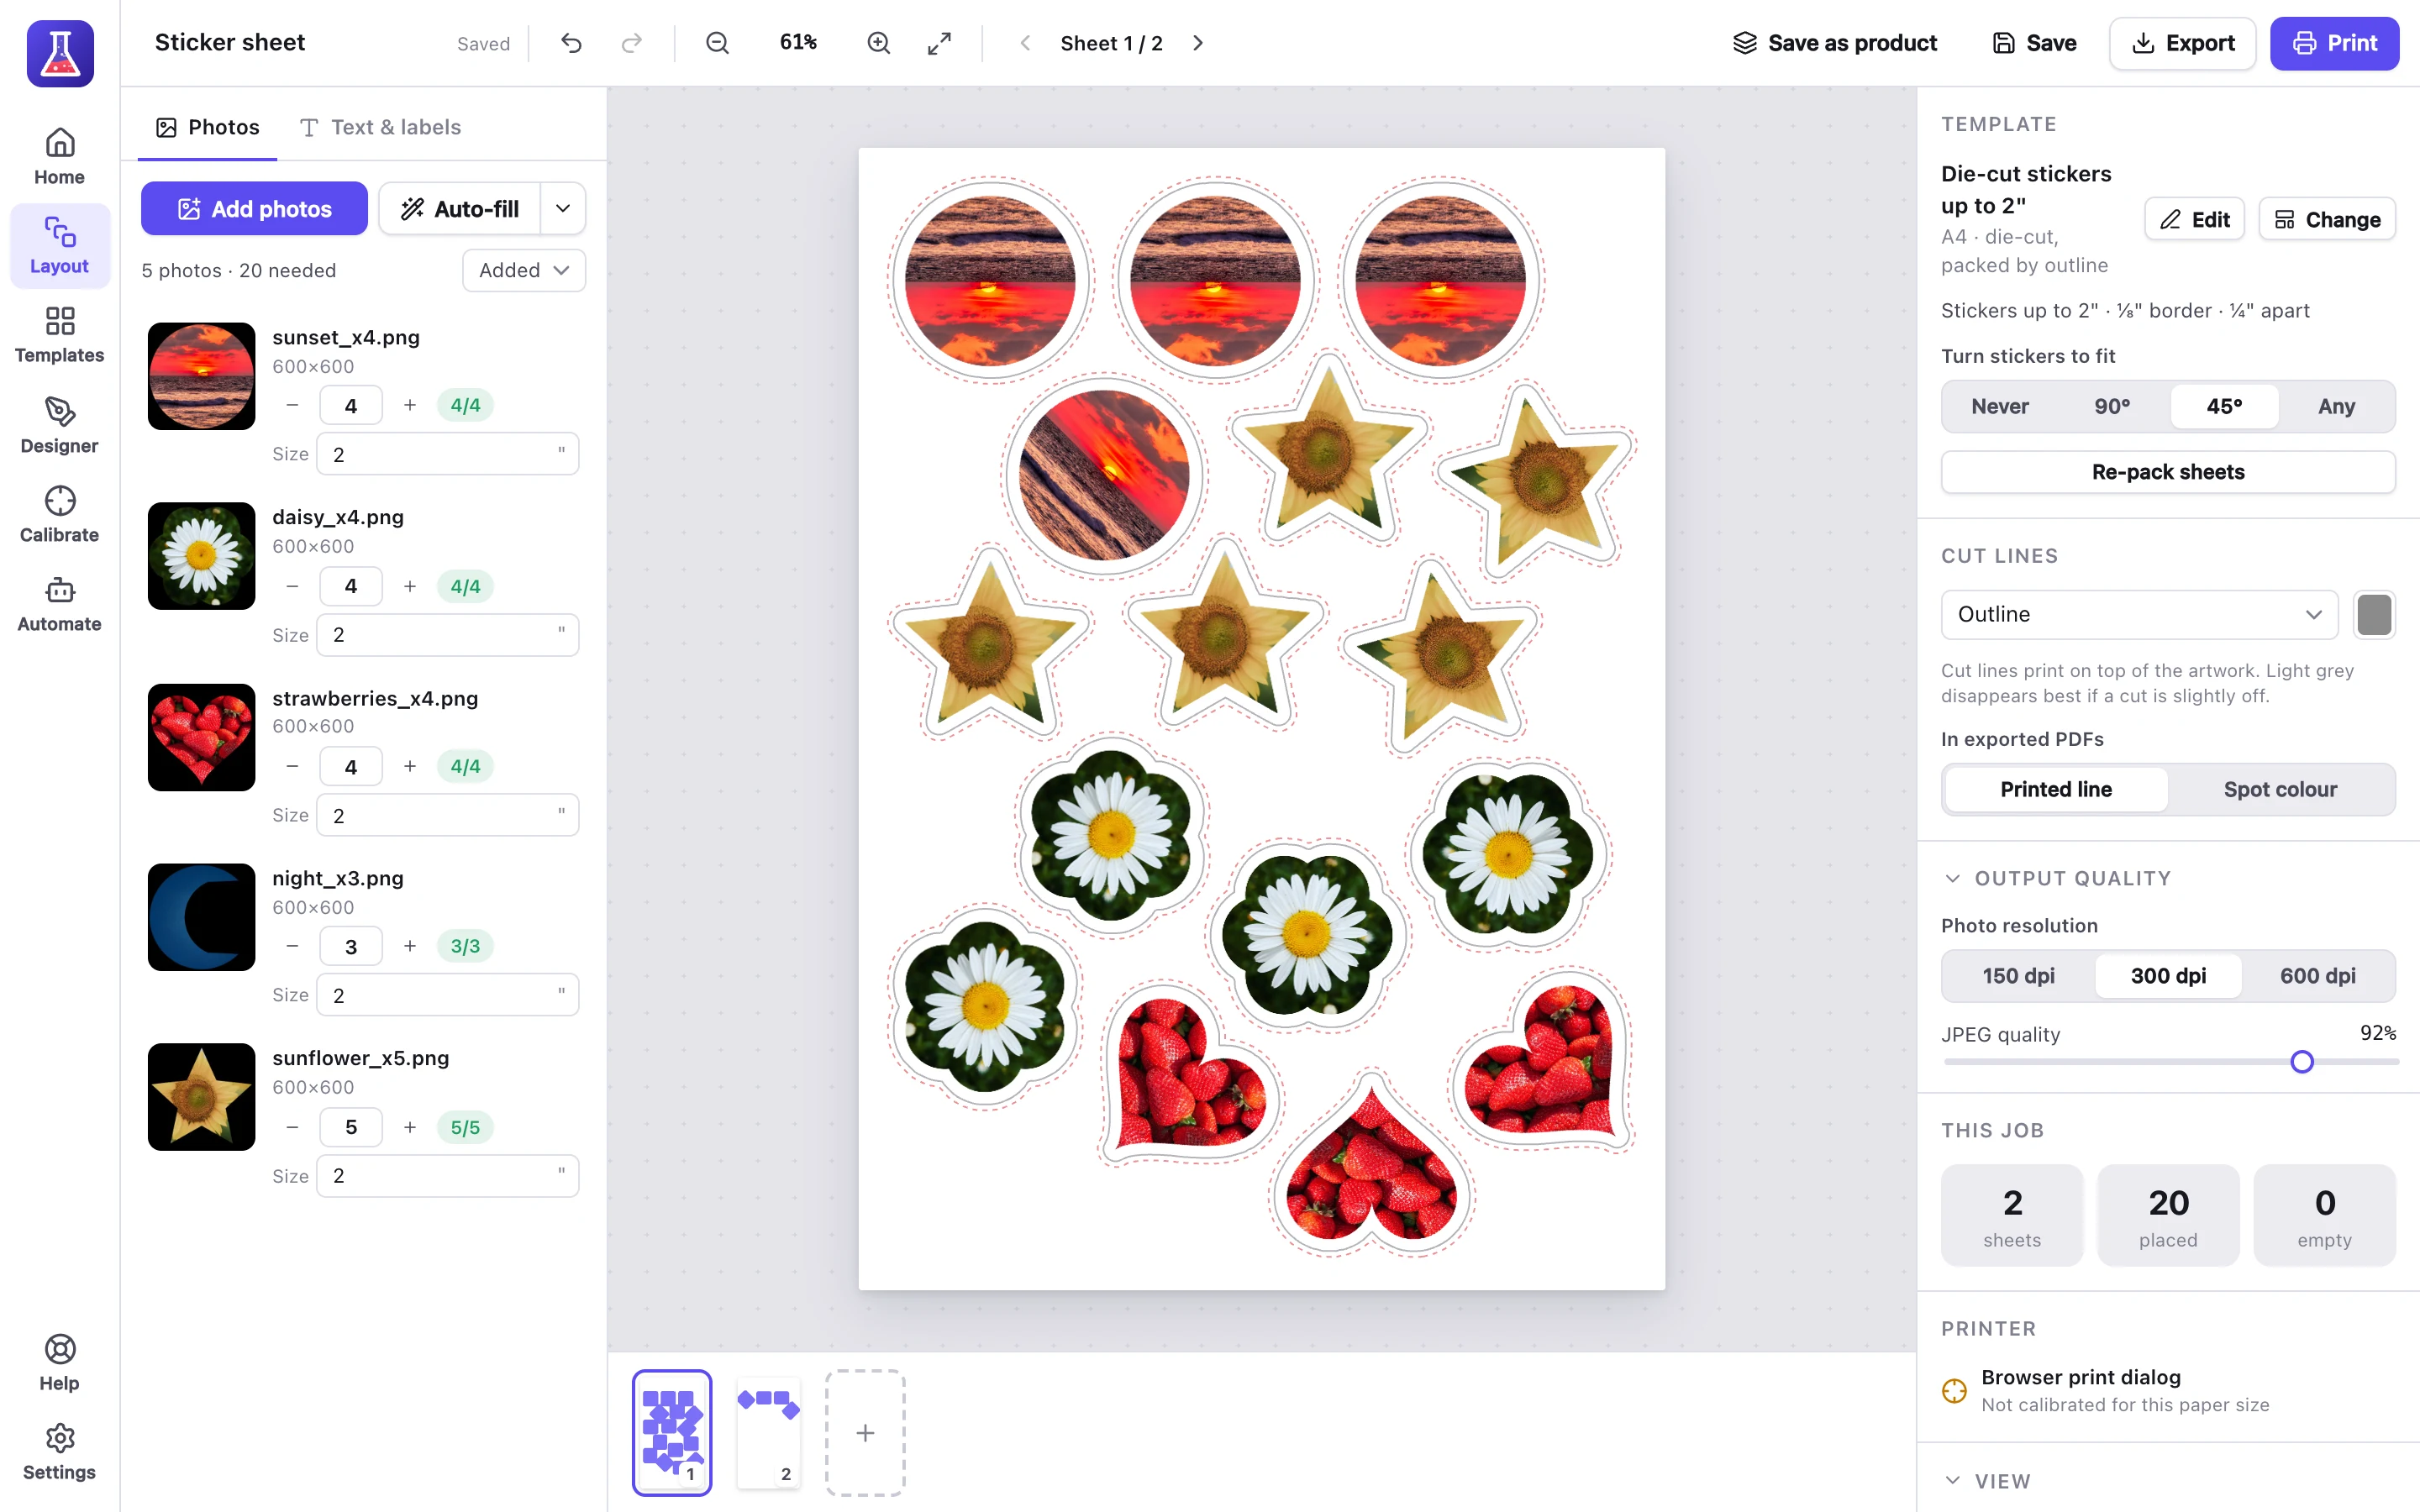
Make a sheet of stickers
- Click Layout and choose Die-cut stickers. Pick a template for your paper and sticker size.
- Drop your designs onto the window.
- Set how many of each you need.
- Click Auto-fill.
- Print the sheets, then cut them out.
Auto-fill places the larger stickers first and fills the gaps with smaller ones.
Designs that work best
| Your design | Where MagLab cuts |
|---|---|
| A PNG with a transparent background | Round the edge of the design. This gives the best result. |
| A design on a plain background (white, or any single colour) | Round the design. The background is left out. |
| A photo with neither | Round the photo’s edge, as a rounded rectangle. |
Holes inside a design are filled, and pieces close together become one sticker.
Change a sticker’s size
The template sets the largest a sticker can be. That is its longest side, with the border included.
- Before Auto-fill: type a Size under the design in the Photos list.
- After: select a sticker on the sheet and change its Size, or Rotate it. The sheet is packed again.
Fix a cut line
Select a sticker and use the Sticker panel on the right. Changes apply to every copy of the design.
- Cut out a gap: click a gap inside the design, such as the middle of a donut, to cut it out. Click it again to fill it back in.
- Pick background: click the background when MagLab didn’t find it. Move Background match if too much or too little is cut away.
- Back to automatic undoes all of this.
Border and bleed
Set the border’s width and colour in the Designer (click Edit next to the template’s name). None cuts round the design itself.
To change one sticker, select it and use Its own border colour.
The border colour carries on a little past the cut line. This is the template’s bleed, so a cut that’s slightly off doesn’t show paper.
Fit more on a sheet
These are in the right-hand panel when nothing is selected.
- Turn stickers to fit chooses how far stickers may turn: Never, 90°, 45° or Any (every 15°, slowest). More turning can fit more on a sheet.
- Re-pack sheets packs every sheet again, for example after removing stickers.
Dropping more designs on a sheet adds them to the room that’s left.
For the same layout every time, choose Grid or Nested rows instead of Packed in the Designer. Each shape is then the largest box a sticker can fill.
Cut them out
Every packed sheet is different, so each sheet gets its own cut file.
| You cut with | Do this |
|---|---|
| Scissors, or a cutter that scans the sheet (such as a Brother ScanNCut) | Leave Cut lines → Outline on. It prints the line round every sticker. |
| A cutting machine | Export → Cut file saves each sheet’s cut lines as SVG, or DXF for Silhouette Studio’s Basic Edition. |
| Silhouette print & cut | Follow the steps below. |
| Cricut Print Then Cut | Export → Cricut saves every different sticker as a transparent PNG. Upload them to Design Space as Print Then Cut images. Each file’s name gives its size and how many you need (dog 63.5x48.2mm x3.png). |
| A print shop’s cutter | In the PDF export, choose Cut lines as → Spot colour (CutContour). Cutting software (Roland VersaWorks, Summa, Mimaki, Graphtec and others) cuts along this line and doesn’t print it. Change the colour’s name in the right-hand panel if the shop uses another. |
Check the size of your first cut against the sheet before cutting a big batch. Your cutter’s software may need its own settings to match.
Cutting with a Silhouette
- In the Designer, turn on Print & cut marks → Silhouette registration marks.
- Print the sheet.
- In Silhouette Studio, turn registration marks on with the same inset, length and thickness.
- Open the sheet’s cut file and send it to cut.
Next
- Templates: change the sticker size, border and spacing in the Designer.
- Automation: print sticker orders by themselves.